File Manager > Extending Functionality
Customize File Bulk Actions
Learn how to add, replace, or remove bulk actions in the File Manager.
This feature is available since Webiny v5.38.0.
- how to add a custom bulk action to the File Manager
- how to discover existing bulk action names
- how to change the position, remove, or replace an existing bulk action
Overview
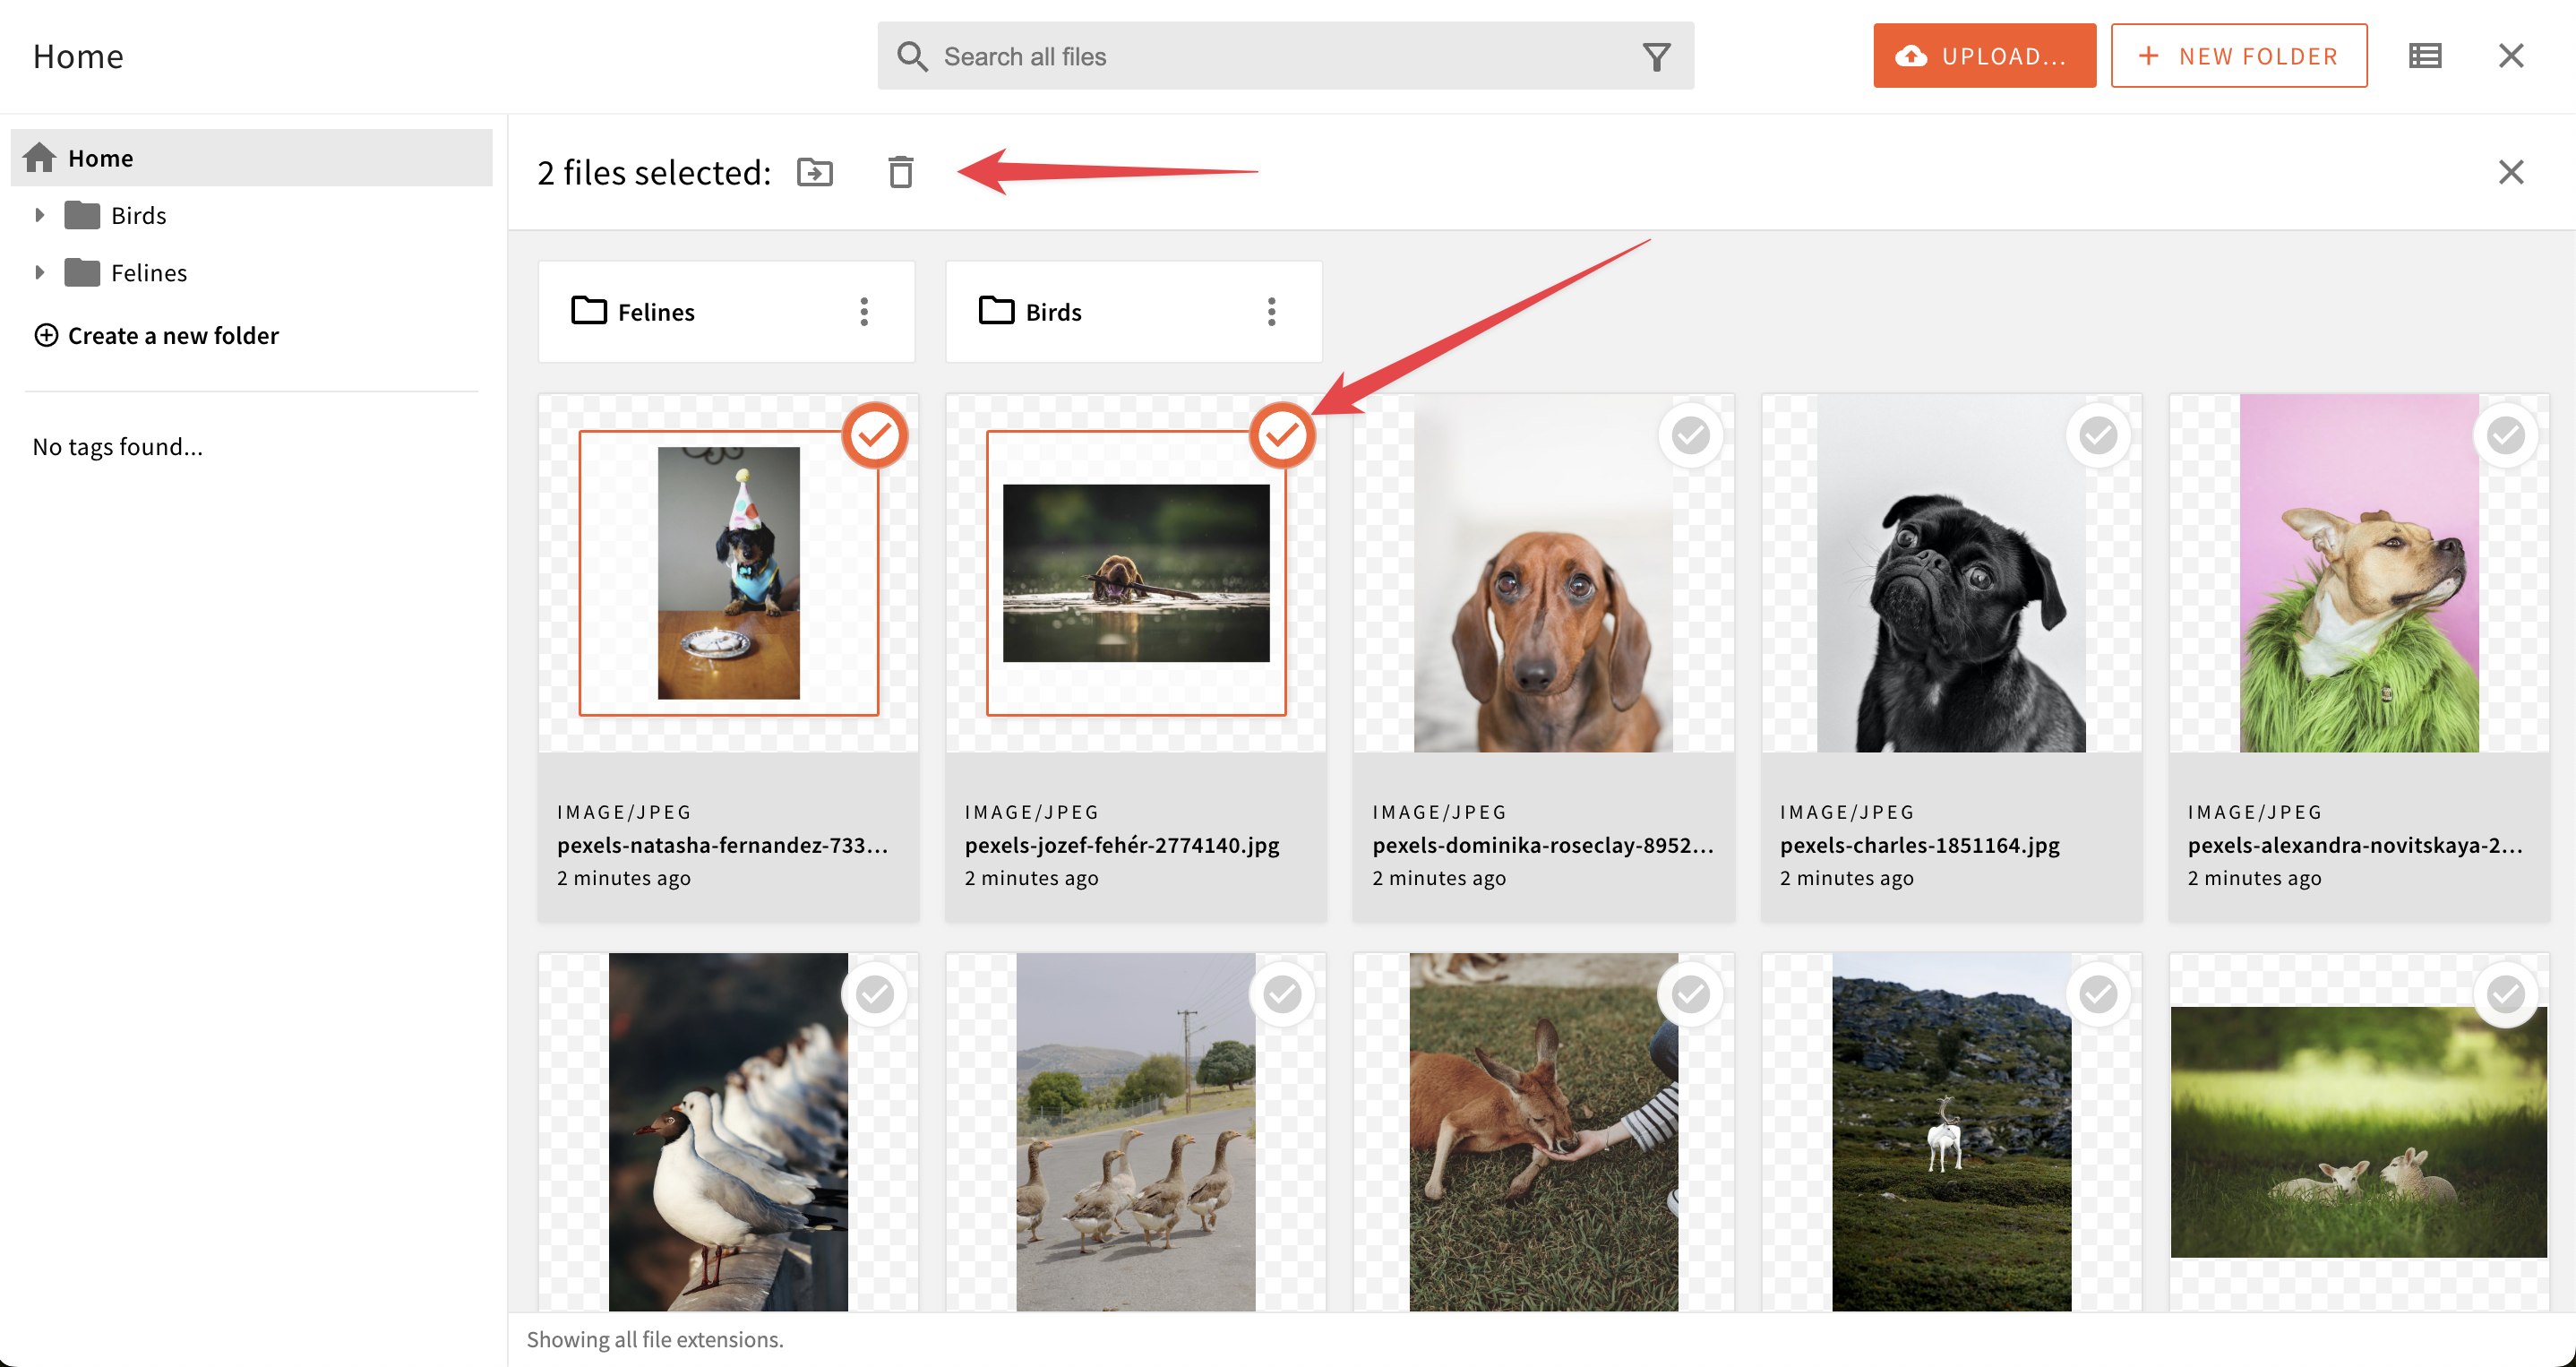
In File Manager, pre-built actions empower users to delete, or move multiple files effortlessly. These actions become visible when you select one or more files from the list.
To work with bulk actions, you need to use the FileManagerViewConfig component. For this article, we will use the BulkAction in the Browser namespace.
Browser is the crucial component of the Admin app’s File Manager. This is where users can easily browse through files, apply filters, perform searches, upload new files and organize them into folders.
If users select one or more files from the list, the bulk action bar will appear.
 Browser and the Built-in Bulk Actions
Add a Bulk Action
To add a new bulk action, use the FileManagerViewConfig component and mount it within your Admin app. This component will serve as the foundation for your bulk actions.
To ensure UI consistency, use the useButtons hook to access four button components:
ButtonDefaultButtonPrimaryButtonSecondaryIconButton
Choose the one that best suits your design needs. In the following examples, we will use the IconButton component.
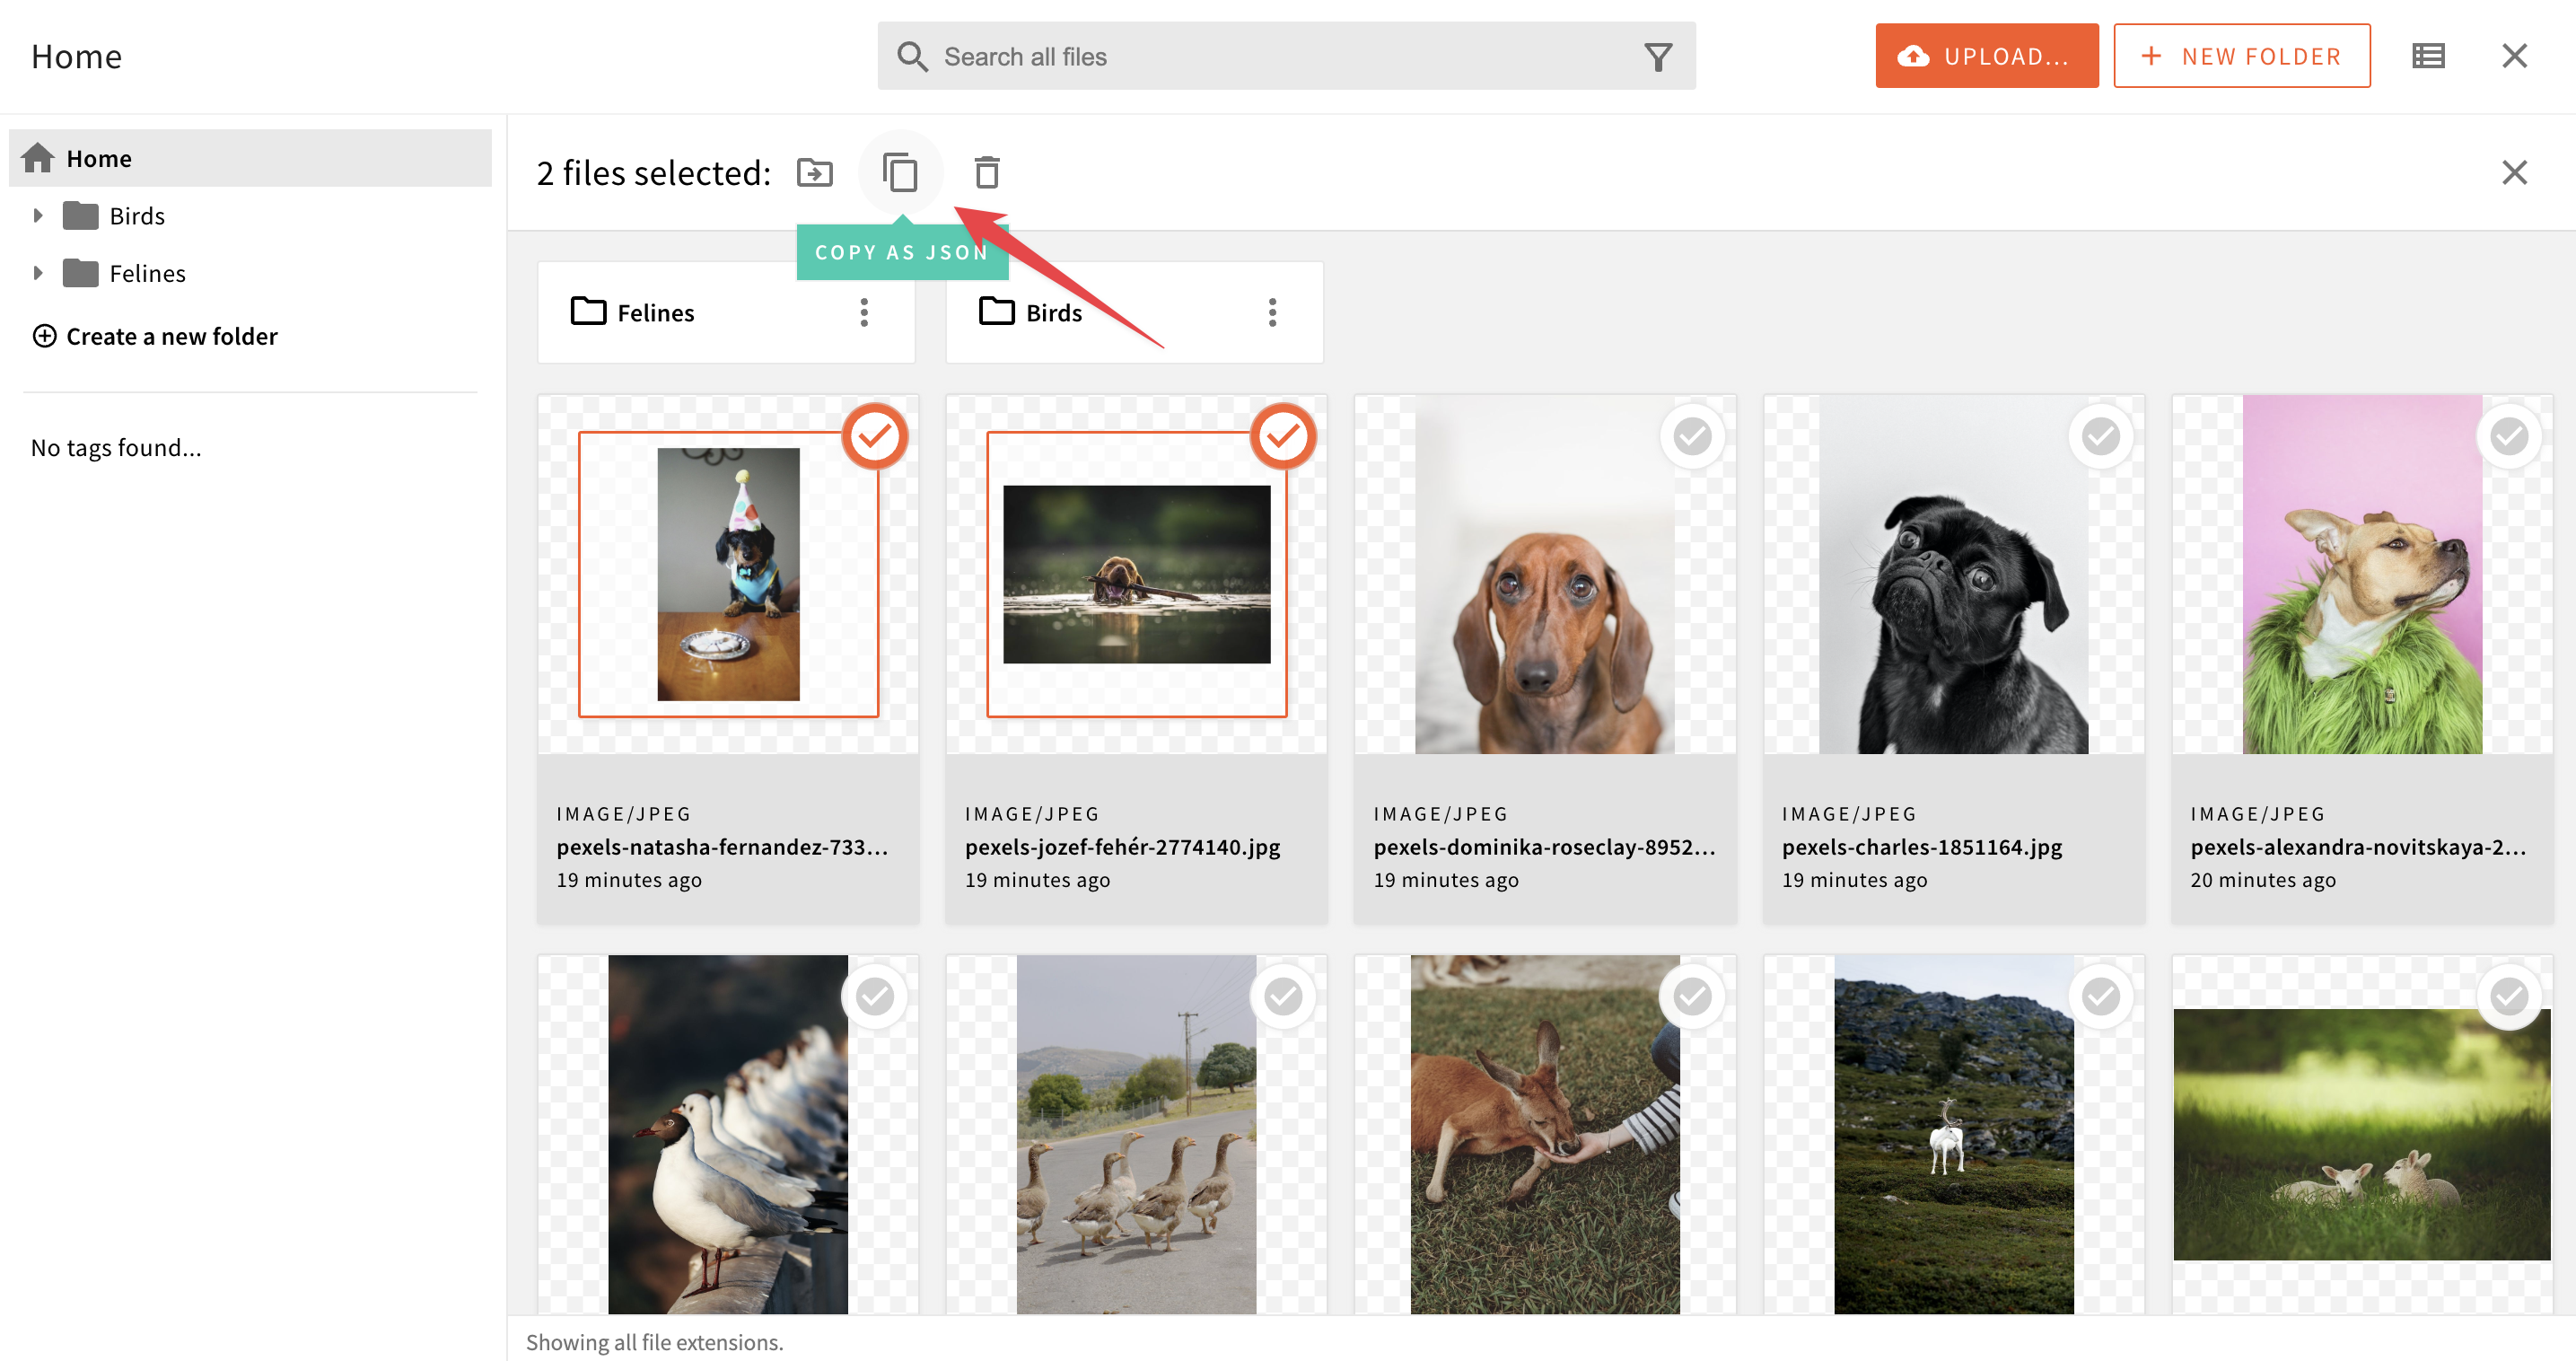
Simple Bulk Action
Here is an example of creating a bulk action that copies data from the selected files to the clipboard in JSON format.
The items property obtained from useWorker() is a crucial part of managing bulk actions: these are the currently selected items within the context of the File Manager.
This is the whole process of registering a new bulk action element.
 Custom Simple Bulk Action
Asynchronous Bulk Action
Sometimes, you may need to execute a bulk action that involves multiple asynchronous tasks, such as sending selected files to an external service. In such cases, we can use the useWorker and useDialogs hooks to create a seamless user experience:
useWorkerprovides the currently selected items and theprocessInSeriesmethod to perform our callback.useDialogprovides methods to show confirmation and result dialogs.
Here’s an example of creating a bulk action that sends the selected files to an external service using fetch and shows the result of each iteration.
For the IconButton component, the onAction prop can accept any method. In the current scenario, we are using the showConfirmationDialog method to open a dialog.
showConfirmationDialog is designed to receive a callback function, which will be executed when the users confirm their action. You can pass any callback function to this method or use the processInSeries method from the useWorker hook.
processInSeries requires a callback as its first parameter. This callback is provided with the current item of the list being iterated and report: use this information to collect the result of the operation and indicate whether it was successful or not. The second parameter is the chunk size, which determines how many items are processed in each batch. You can adjust this value to control the size of each batch.
showResultsDialog is used after the completion of the sending process to present the user with a summary of the actions performed, including information about successful items sent and any errors encountered during the process. This allows the user to review a detailed report of the entire operation.
 Asyncronous Bulk Action
Discover Bulk Actions
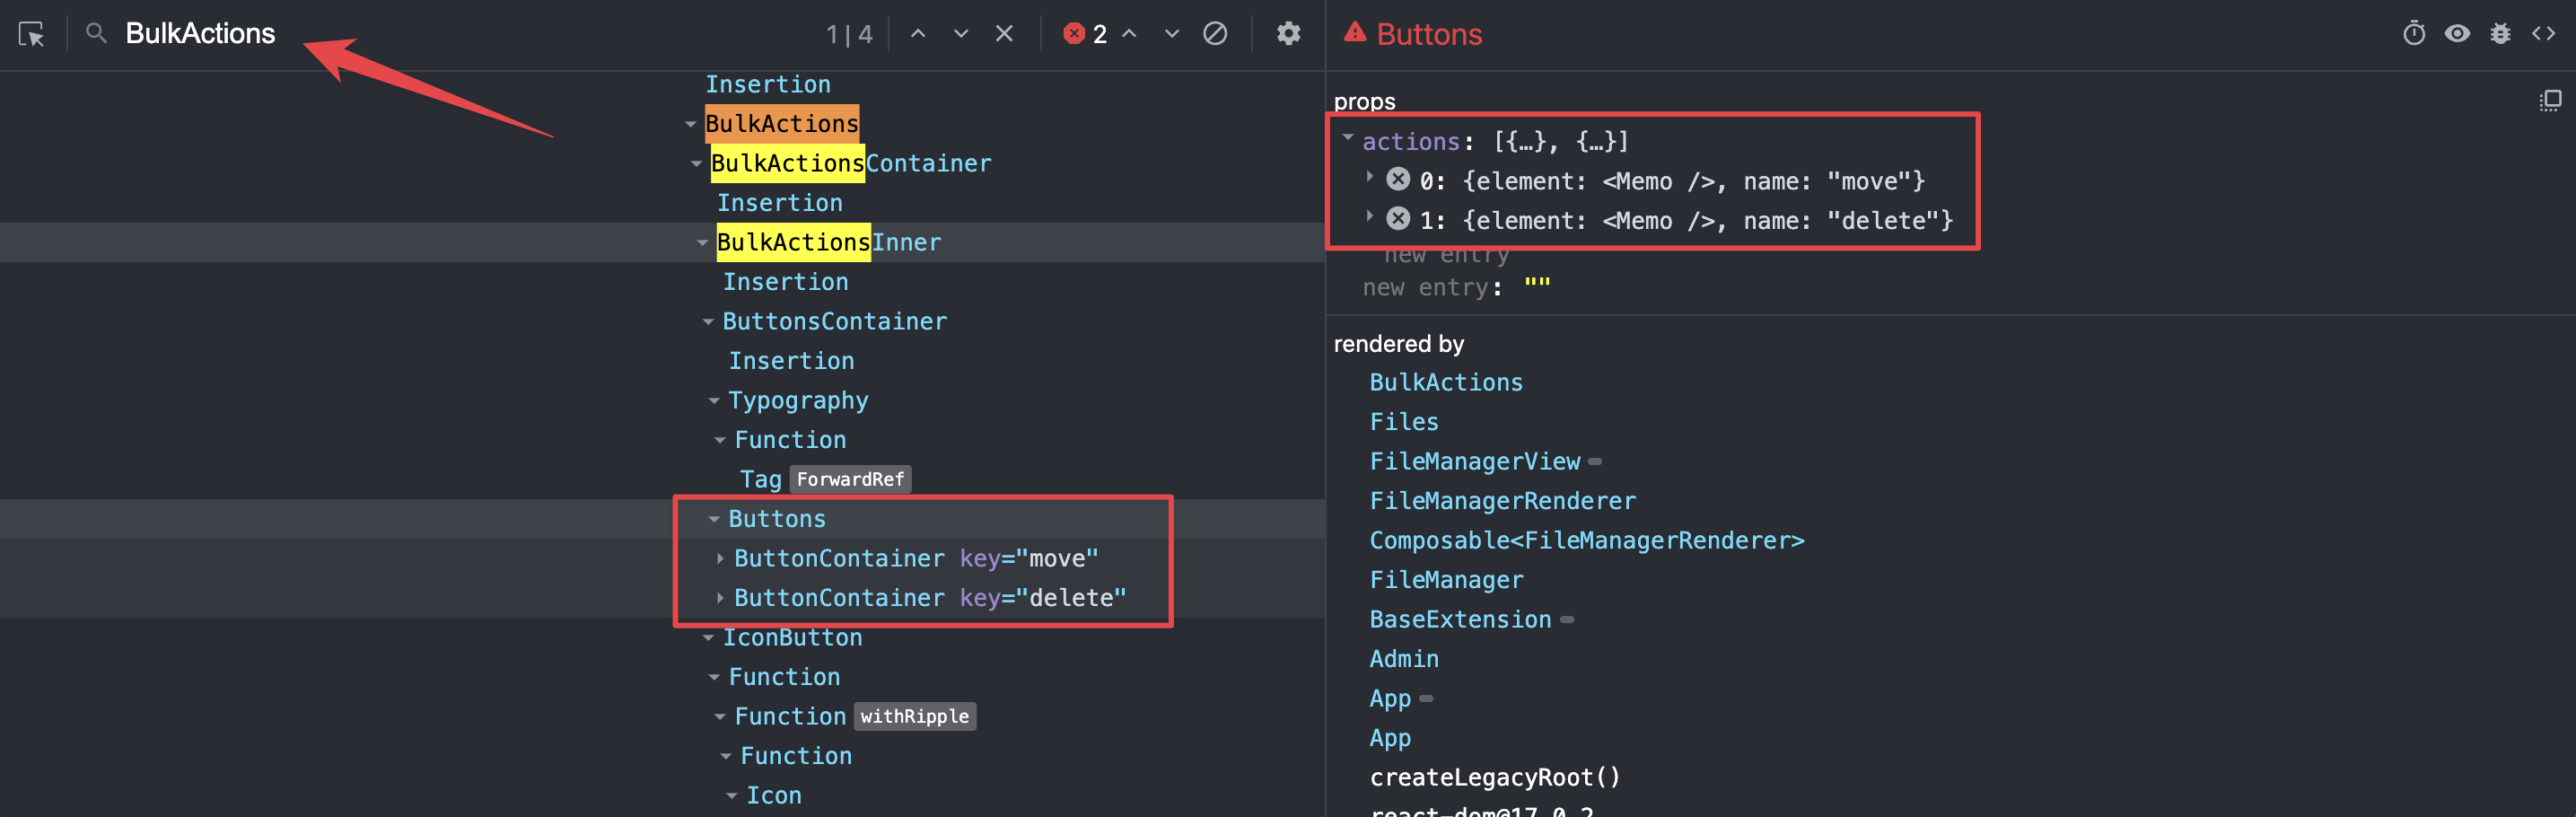
This section demonstrates how you can discover the names of existing bulk actions. This is important for further sections on positioning, removing, and replacing bulk actions.
The easiest way to discover existing bulk actions is to use your browser’s React Dev Tools plugins, select at least one file and look for the Buttons element inside BulkActions. From there, you can either look for actions prop or look at the child elements and their keys:
 Discover Existing Bulk Actions
Position a Bulk Action
To position your custom bulk action before or after an existing action, you can use the before and after props on the <Browser.BulkAction> element:
 Position Your Action Before Another Action
Remove a Bulk Action
Sometimes you might want to remove an existing bulk action. All you need to do is reference the action by name and pass a remove prop to the <Browser.BulkAction> element:
Replace a Bulk Action
To replace an existing bulk action with a new action element, you need to reference an existing action by name and pass a new component via the element prop: