Webiny Enterprise
Setup Theme Manager
Learn how to configure a Theme Manager in your Webiny project
Webiny Enterprise license is required to use this feature.
This feature is available since Webiny v5.22.0.
- how to enable theme management in the existing Webiny project
- how to assign themes to individual tenants
Overview
Theme Manager module makes it possible to assign website themes to individual tenants. Root tenant has access to all themes that are registered in the Admin app, and gets to decide which of those themes will be available to the sub-tenant.
 Assign Themes to an Individual Tenant
1) Prepare the Project
Your project needs to be at version 5.34.0 or greater, to use this version of the feature. Note that the setup is slightly different in the earlier versions of Webiny, so if you’re using an older version, please switch to the corresponding version of the documentation.
Please follow the upgrade guide to upgrade your project to the appropriate version.
Alternatively, you can create a new >=5.34.0 project, by running:
If creating a new project, you’ll have to first configure multi-tenancy. Follow this guide, if that’s the case.
2) Add New Dependencies
We need to add several new packages to the project.
Add Theme Manager module dependency to the GraphQL API dependencies:
Add Theme Manager module dependency to the Admin app dependencies:
Add Theme Manager module dependency to the Website app dependencies:
3) Import Theme Manager in the GraphQL API
Open apps/api/graphql/src/index.ts, and import the Theme Manager plugin:
Then, add the plugin to the Lambda handler, towards the end of the plugins list. This plugin is extending the Page Builder app, so it has to be registered after the Page Builder. See an example in the image below:
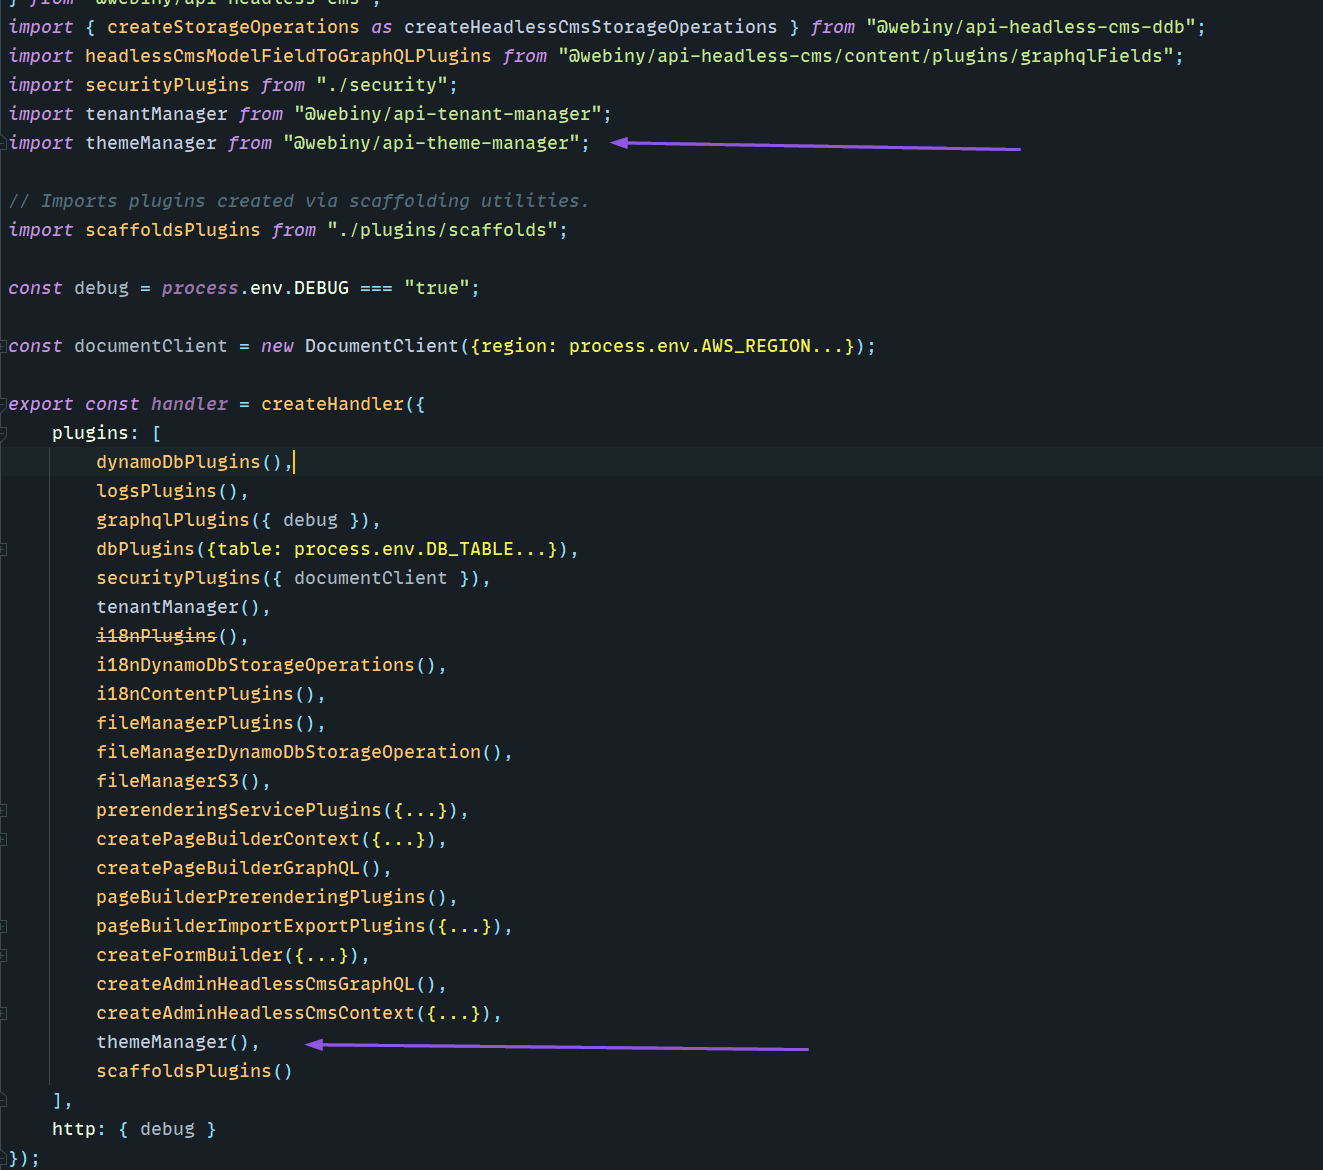 Enable Theme Manager Plugin in the GraphQL API.
Since we’ve made changes to the API project application (to Webiny’s GraphQL API), we need to deploy them. To do that, run the following command:
4) Import and Configure Theme Manager in the Admin App
Now we need to enable the Theme Manager module in the Admin app. In your apps/admin/src/App.tsx, add the following:
What’s happening here is: we import the ThemeManager component, and we pass it an array of theme objects. As you can see from the code, themes are lazy-loaded, using dynamic imports . This will create separate chunks for every theme, so only the theme that is actually being used will be loaded in the browser.
The name property will be used by Webiny, and will be stored to the database when you assign a certain theme to a tenant, and in the Page Builder settings. The label property will be used in the Admin app UI, as a human-friendly theme descriptor.
5) Import and Configure Theme Manager in the Website App
Now we need to enable the Theme Loader module in the Website app. In your apps/website/src/App.tsx, add the following:
Here, we’re using the createThemeLoader factory to create a theme provider, and we’re passing it an array of themes like we did in the Admin app. On website render, ThemeLoader will make sure that the correct theme is loaded for the particular tenant.
With the above setup, your system is now ready to add more themes and switch between them. However, your original theme is still statically imported in your plugins (in both Admin and Website apps).
To remove static imports, simply remove the theme import statement and plugin registration from the following files:
apps/admin/src/plugins/index.tsapps/website/src/plugins/index.ts
6) Adding More Themes
Every Webiny project contains one theme, by default. You can find it in your project, by navigating to apps/theme folder. It’s a simple yarn workspace which contains code. It doesn’t have its own build process. It’s bundled together with the app which imports it (like admin or website).
To create more themes, all you have to do is duplicate the existing theme workspace. Here’s how to do it, step by step:
1) Duplicate the theme folder, and call it theme-1.
2) Edit its package.json file (apps/theme-1/package.json), and change the name property to theme-1. This is very important, as this will be the name of the module you’ll be importing in your apps.
3) Add this new workspace path to the project level package.json, located at <project>/package.json:
4) Run yarn to register the new workspace.
5) Add the new theme to admin and website dependencies:
With this, you can now add your new theme in the Admin app, like so:
And we also need to add the new theme in the Website app:
Once the code changes are done, deploy your Admin and Website apps, by running:
Every time you add a new theme, you need to deploy your Admin and Website apps.
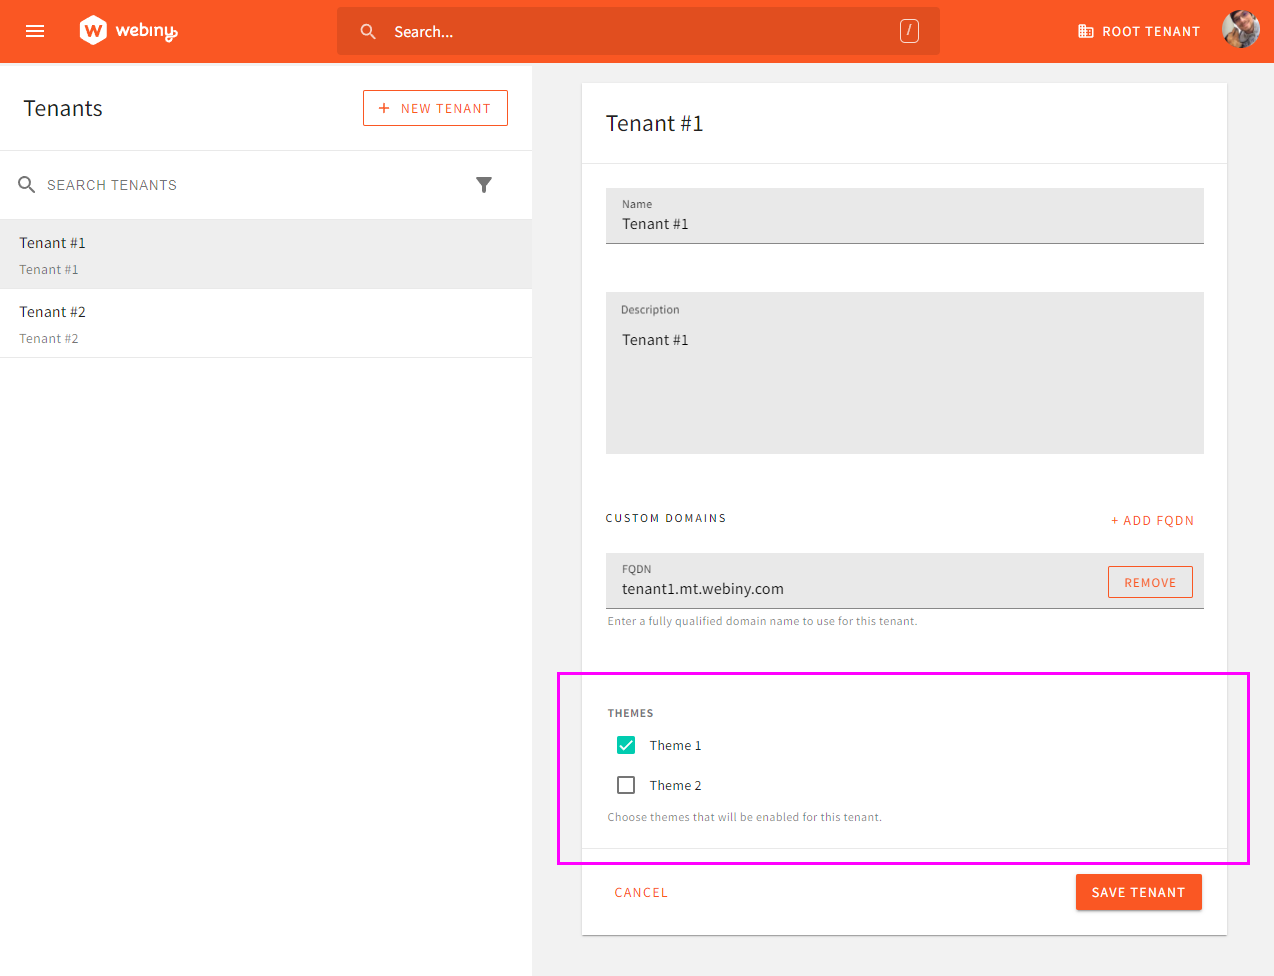
7) Assigning Themes to Tenants
In the Tenant Manager, your themes will be visible in the tenant creation form. You can assign as many themes as you like to an individual tenant. Tenants will then be able to activate one of the assigned themes in their Page Builder settings.
Assign Themes to an Individual Tenant8) Activating a Theme Within the Page Builder
Tenant admin users need to activate a specific theme in Settings -> Page Builder -> Website:
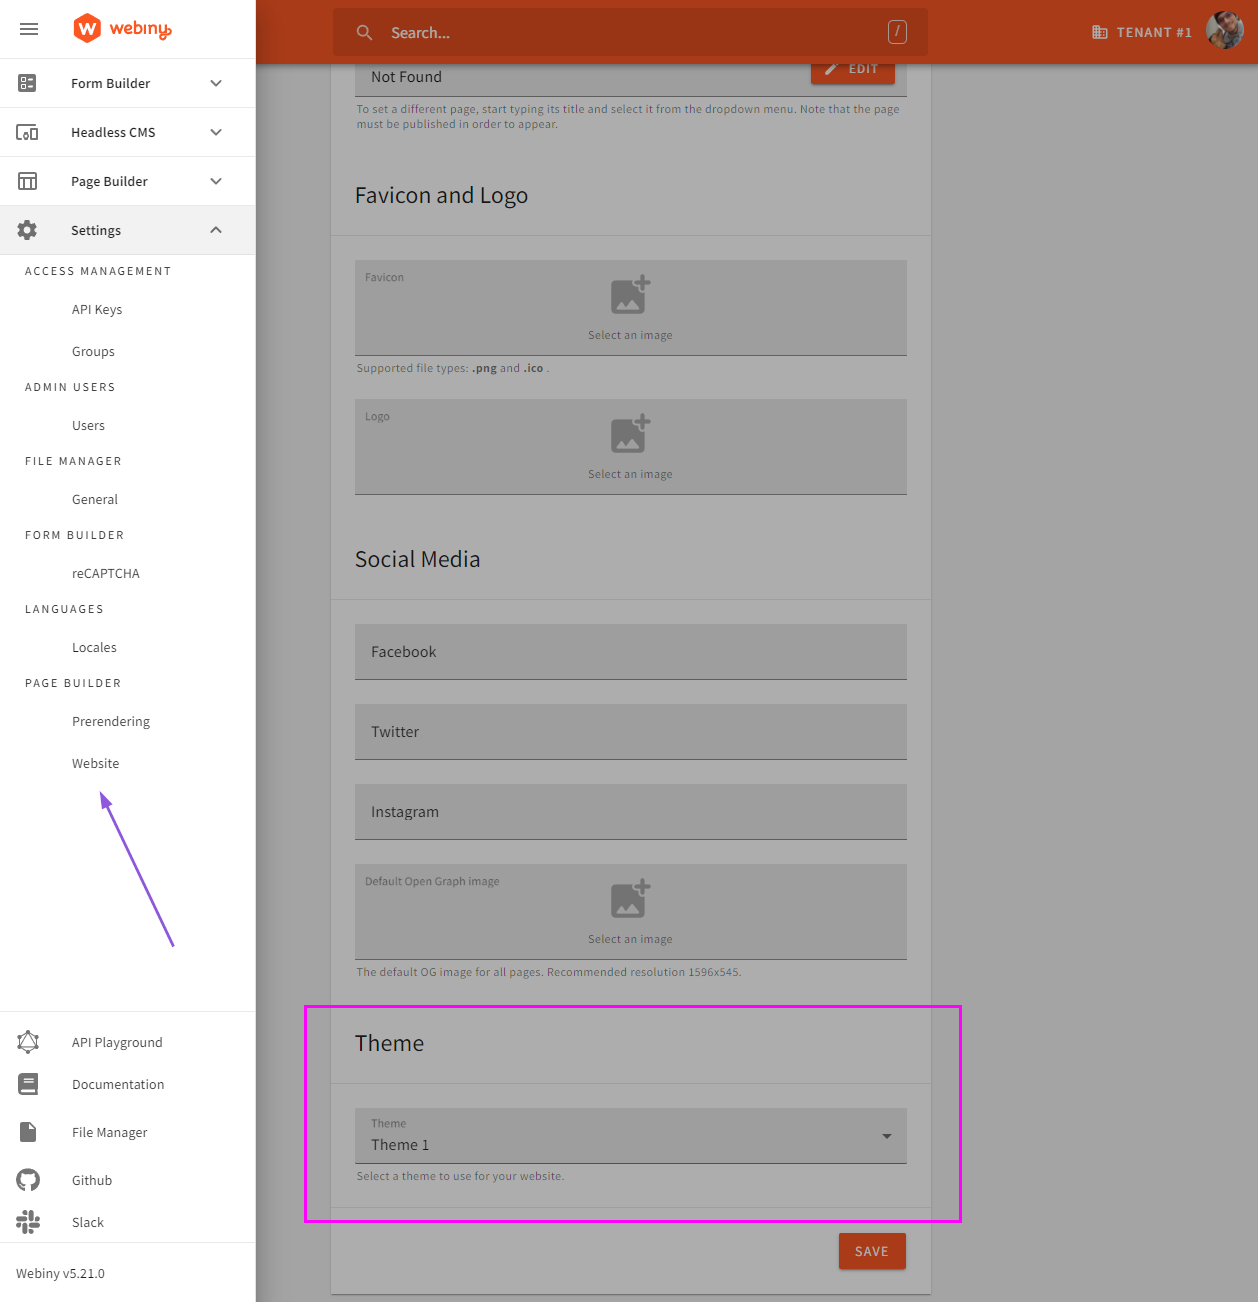 Activate a Specific Theme
Conclusion
This concludes the basic setup of themes in a multi-tenant environment. Note that the instructions provided in this article are written in such a way as to cause the least changes to your existing project structure. At this point, you can already see that things can become repetitive (like adding workspaces, adding themes to both Admin and Website apps, etc.).
Here are some tips to make it more maintainable:
- group your themes in a folder called
themes(apps/themes/theme-1,apps/themes/theme-2, etc.) - use a workspace wildcard to cover all workspaces within the
themefolder (apps/themes/*) - create a single shared workspace to export all theme definitions. This will reduce the code duplication, and you will only need to specify new themes in this one shared workspace, which is then imported within Admin and Website apps.