Infrastructure
Reset State Without Redeploying
Learn how to roll back the data in your Webiny project by restoring from DynamoDB backups and Elastic Search / OpenSearch snapshots
- How to backup DynamoDB Tables
- How to take ElasticSearch Snapshots
- How to restore DynamoDB tables
- How to restore ElasticSearch indexes
AWS uses OpenSearch as a service to manage ElasticSearch domains. In this article I have used the terms interchangeably.
Introduction
It’s not always feasible to destroy your Webiny instance once you’ve started to create entries. If you need to delete entries in the Headless CMS and effectively restore your instance to a previous state, you can follow along here.
You must follow along with this tutorial before you begin creating entries, since it depends on creating backups that you can use to restore your Webiny instance.
Prerequisites
You need to have a deployed Webiny instance and have logged in to your AWS account. You also need your root user access key ID and secret.
Step 1: Back Up DynamoDB Tables
Once you’ve logged in to the AWS account where you deployed your Webiny instance, navigate to DynamoDB in the menu.
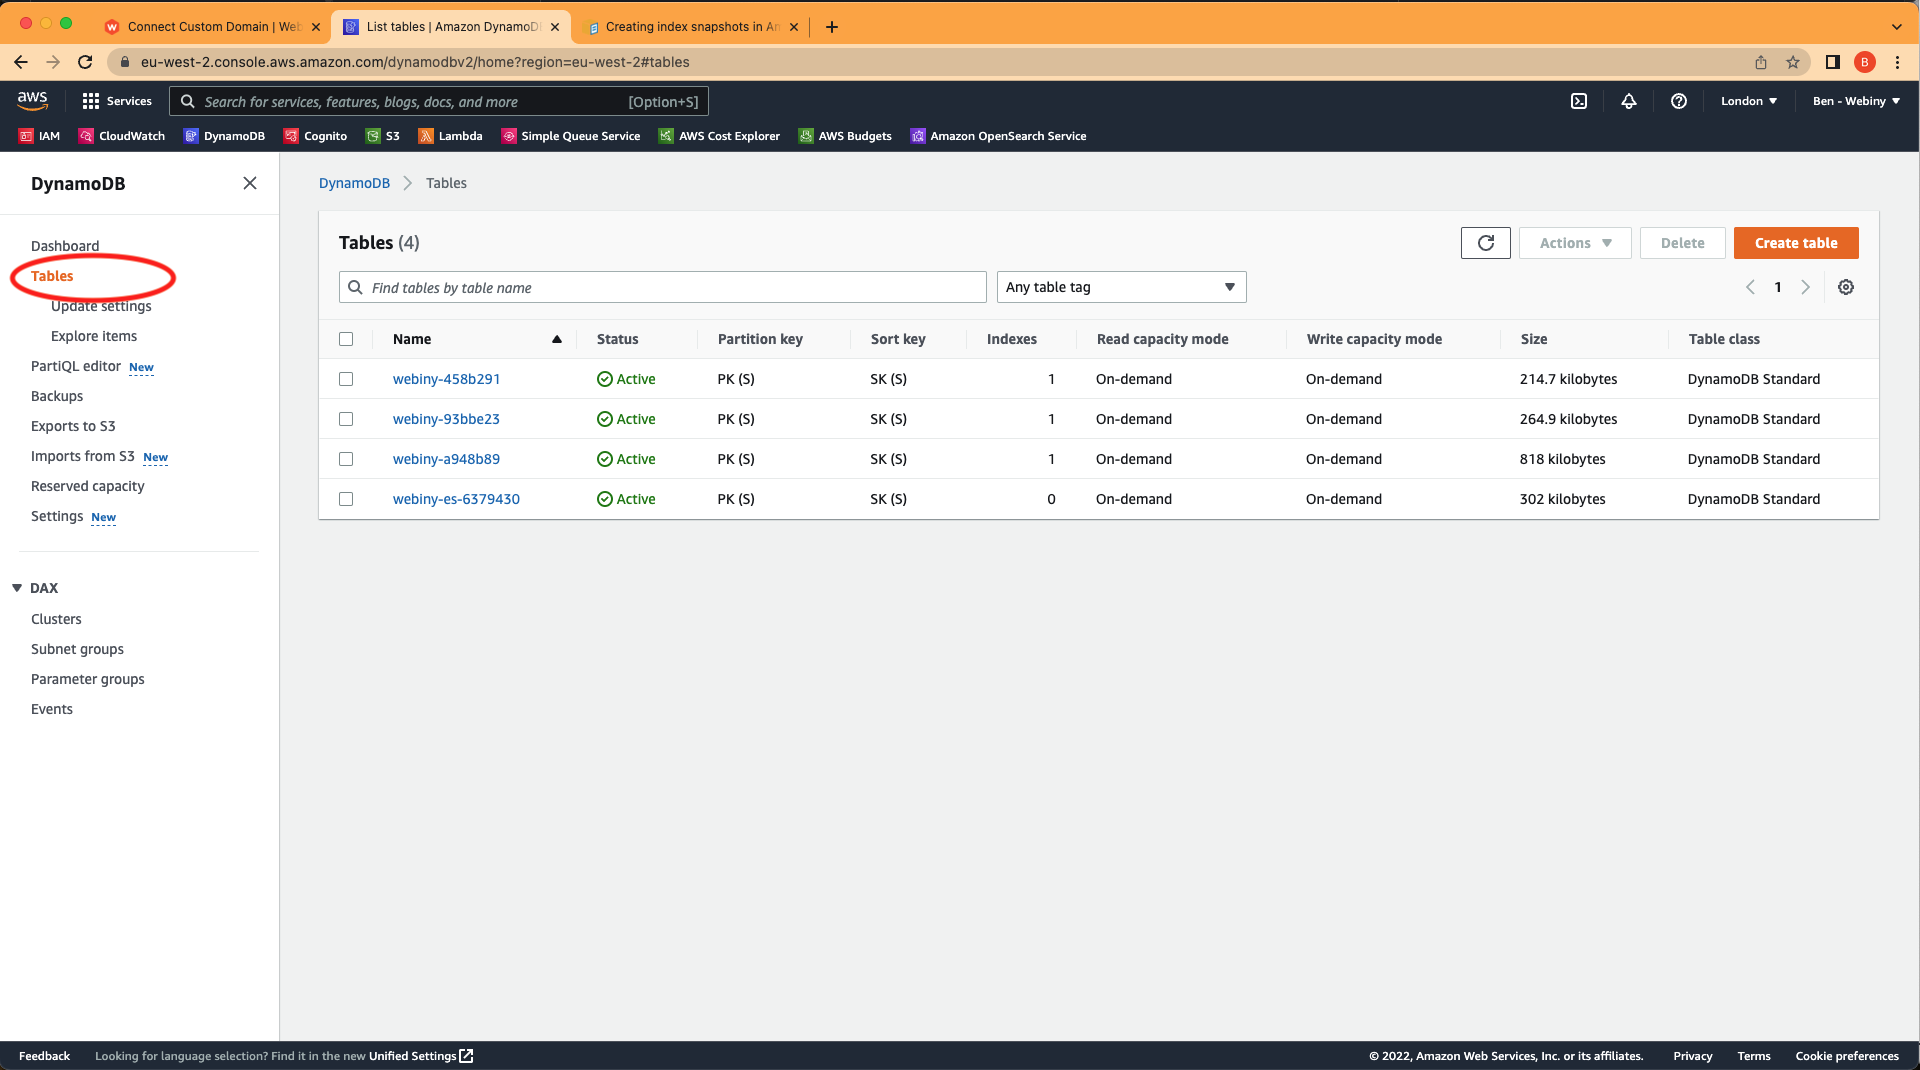 DynamoDB tables in the AWS account area
If you’re not sure which DynamoDB table is associated with which Webiny instance, you can navigate to .pulumi/apps/core/.pulumi/stacks/{env}.json to find the table id.
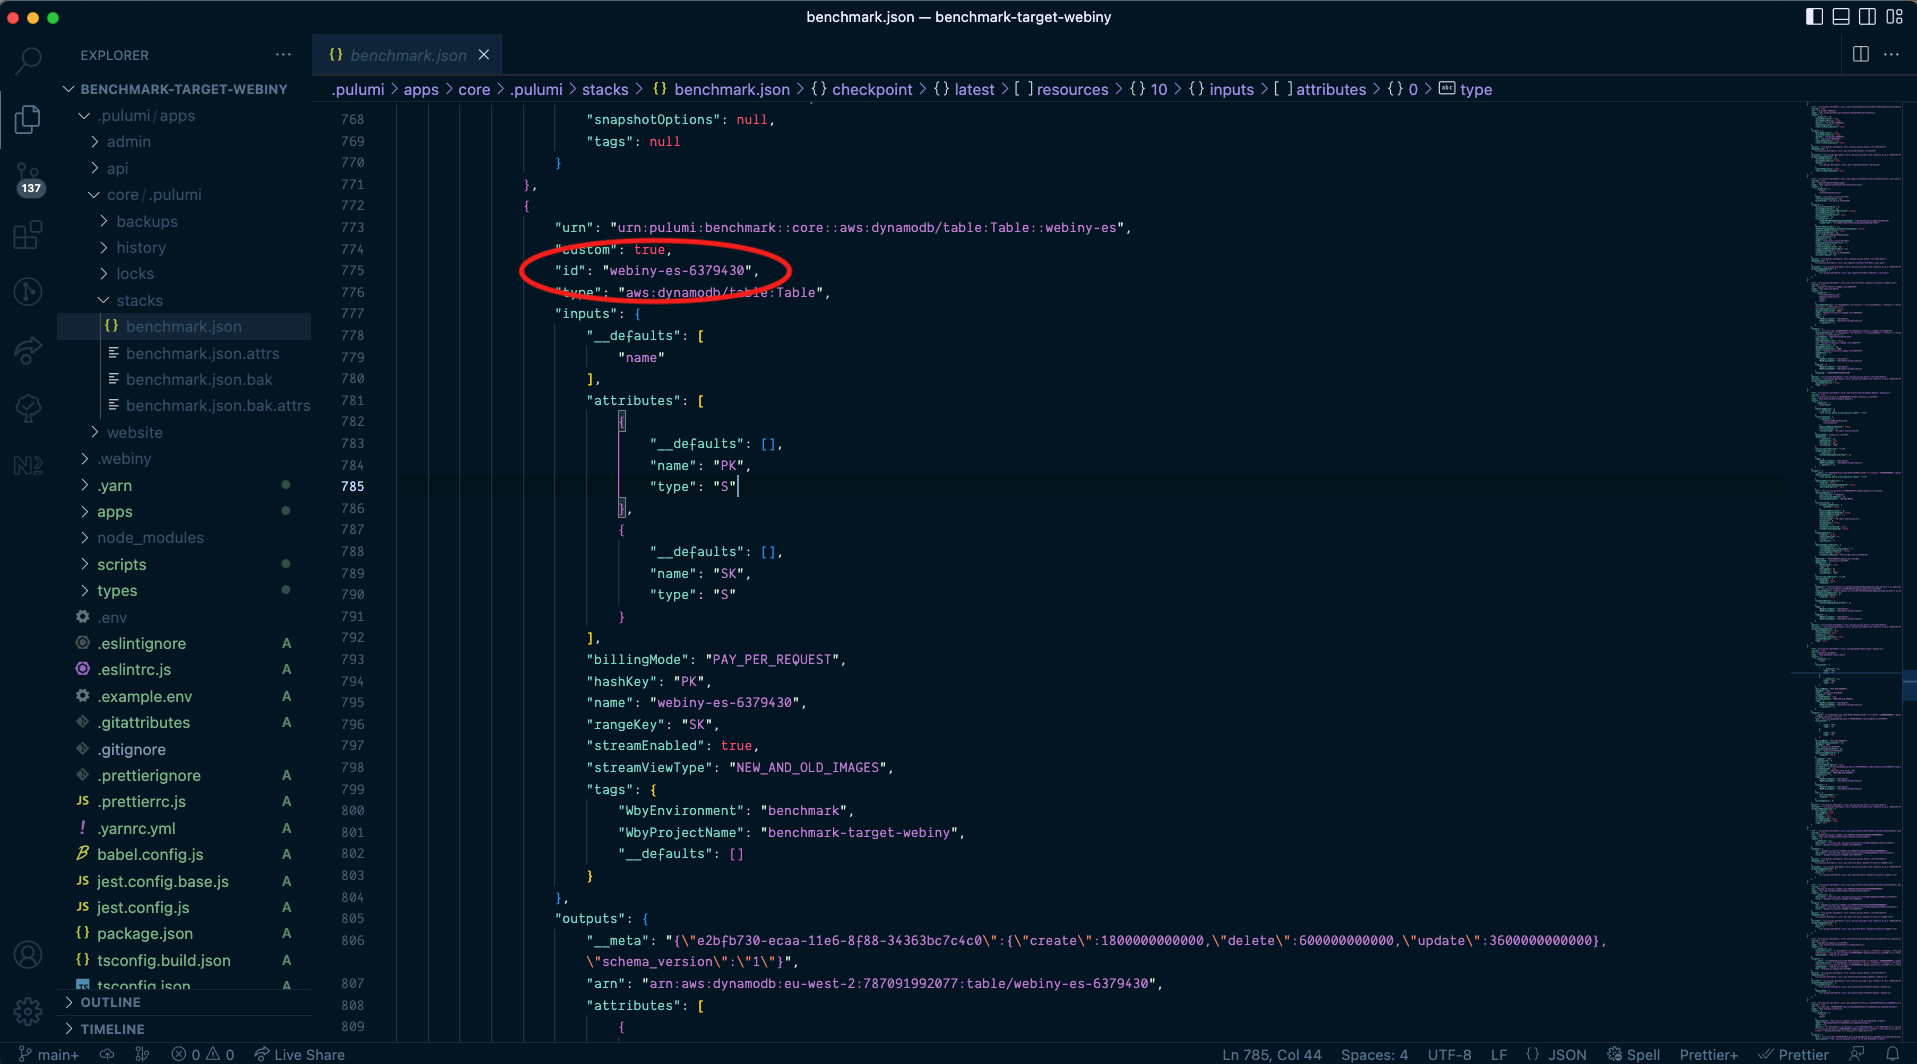 Locating the ID of your DynamoDB table
Go into the table and click on “Create on-demand backup”.
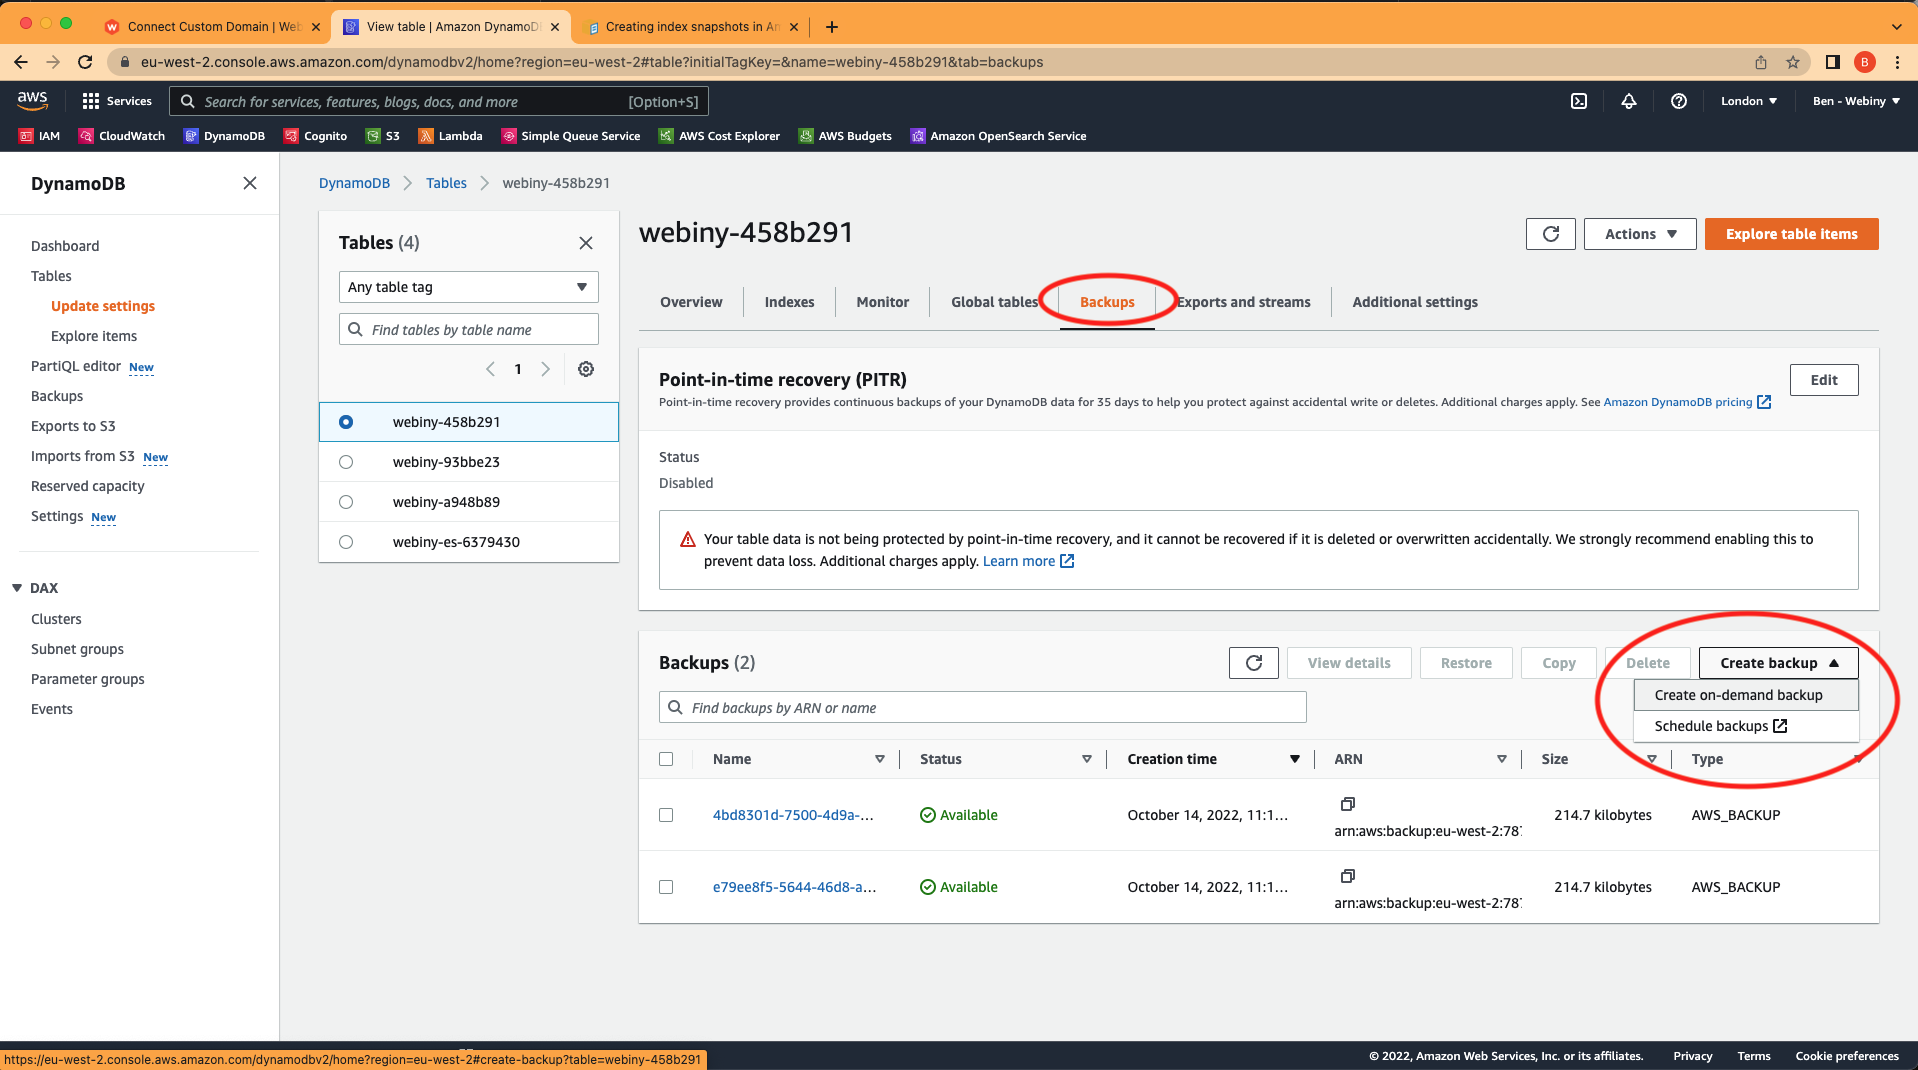 Creating on-demand backups
If you only have a DynamoDB instance, you can skip the next step and go straight to “restoring DynamoDB tables from backup”.
Step 2: Create OpenSearch Snapshots
To follow the steps below you will need to get the domain endpoint of the OpenSearch. You can find this by navigating to the OpenSearch Service dashboard for the region you deployed webiny to, opening up the domains menu item, clicking on the name of your domain, and copying the domain endpoint as shown in the screenshot below:
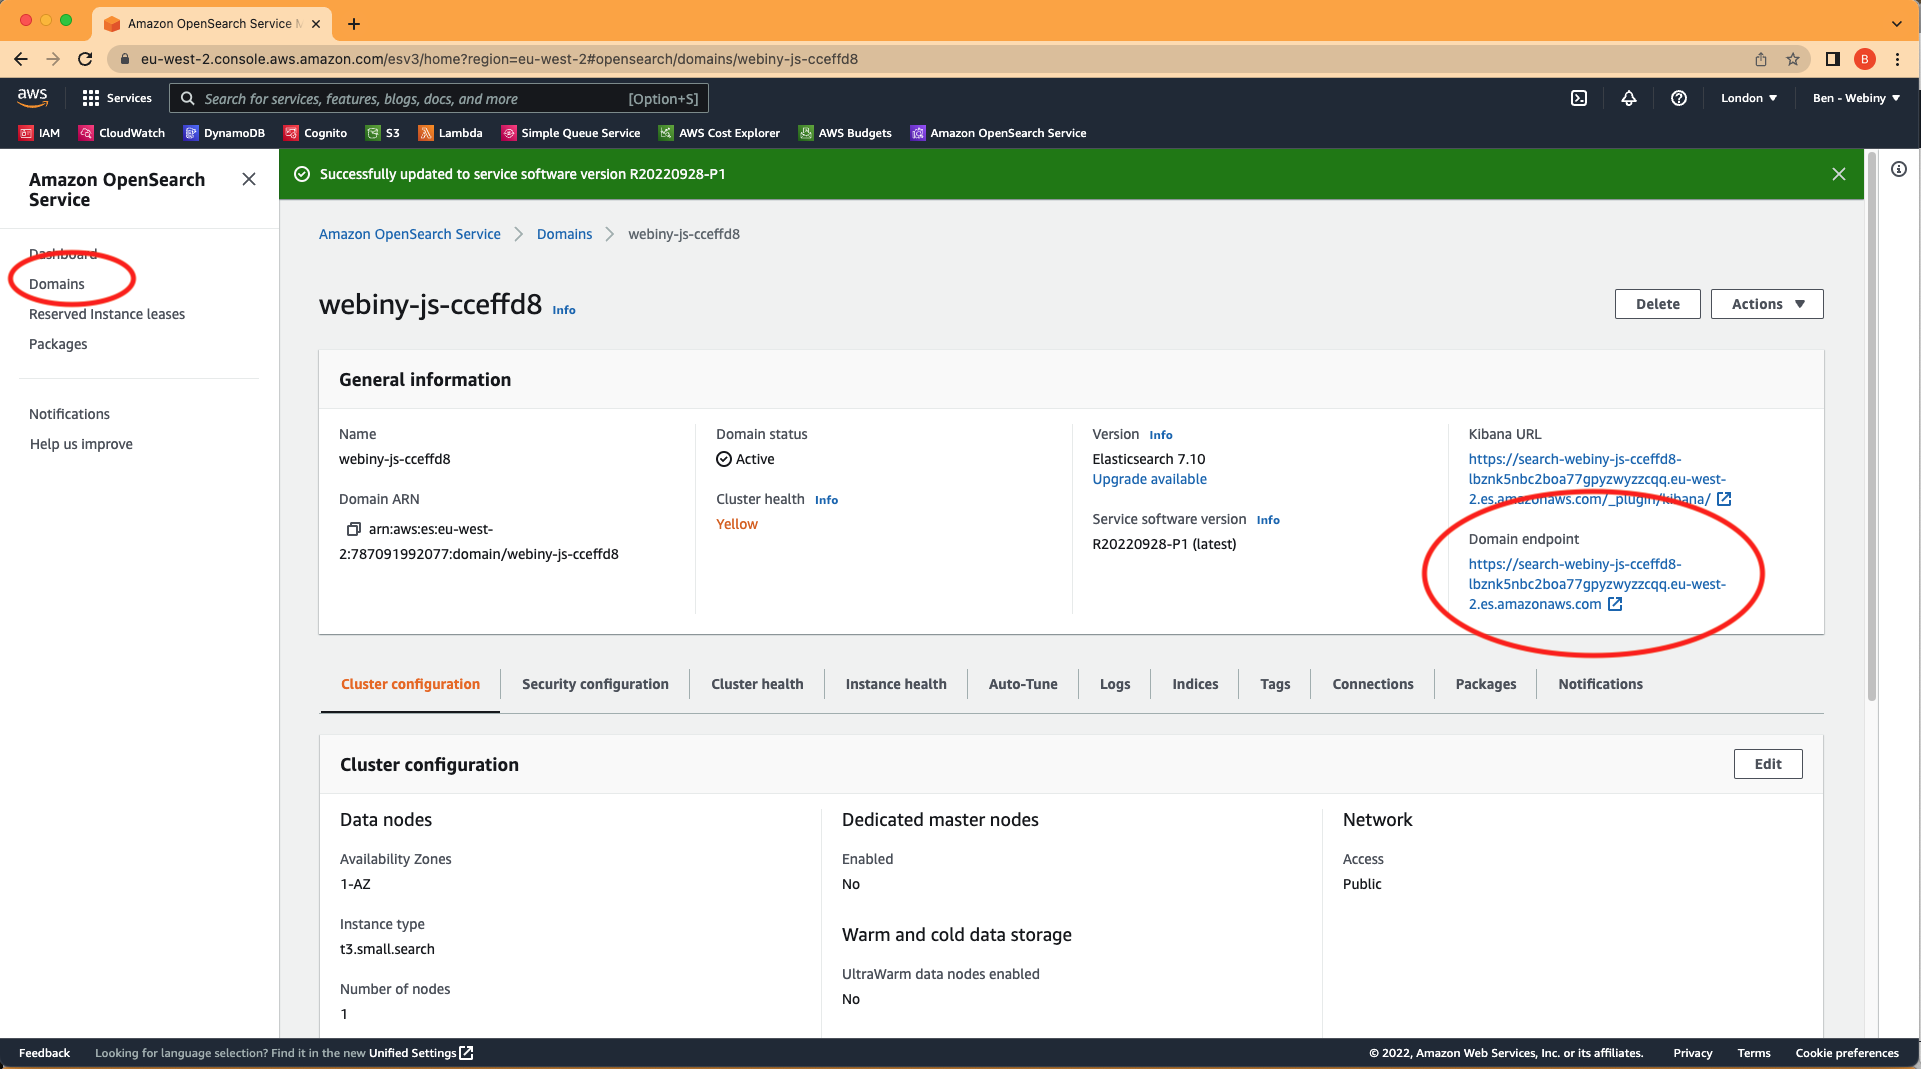 How to find the OpenSearch Service domain endpoint
The full details of how to create snapshots are in this AWS Docs page , but we’ll outline the steps you need specifically for a Webiny instance.
- Create an S3 bucket to store your snapshots
- Create an IAM role to delegate permissions to OpenSearch Service (see also the table heading “IAM role” on this page for the details of the policy you will need to create)
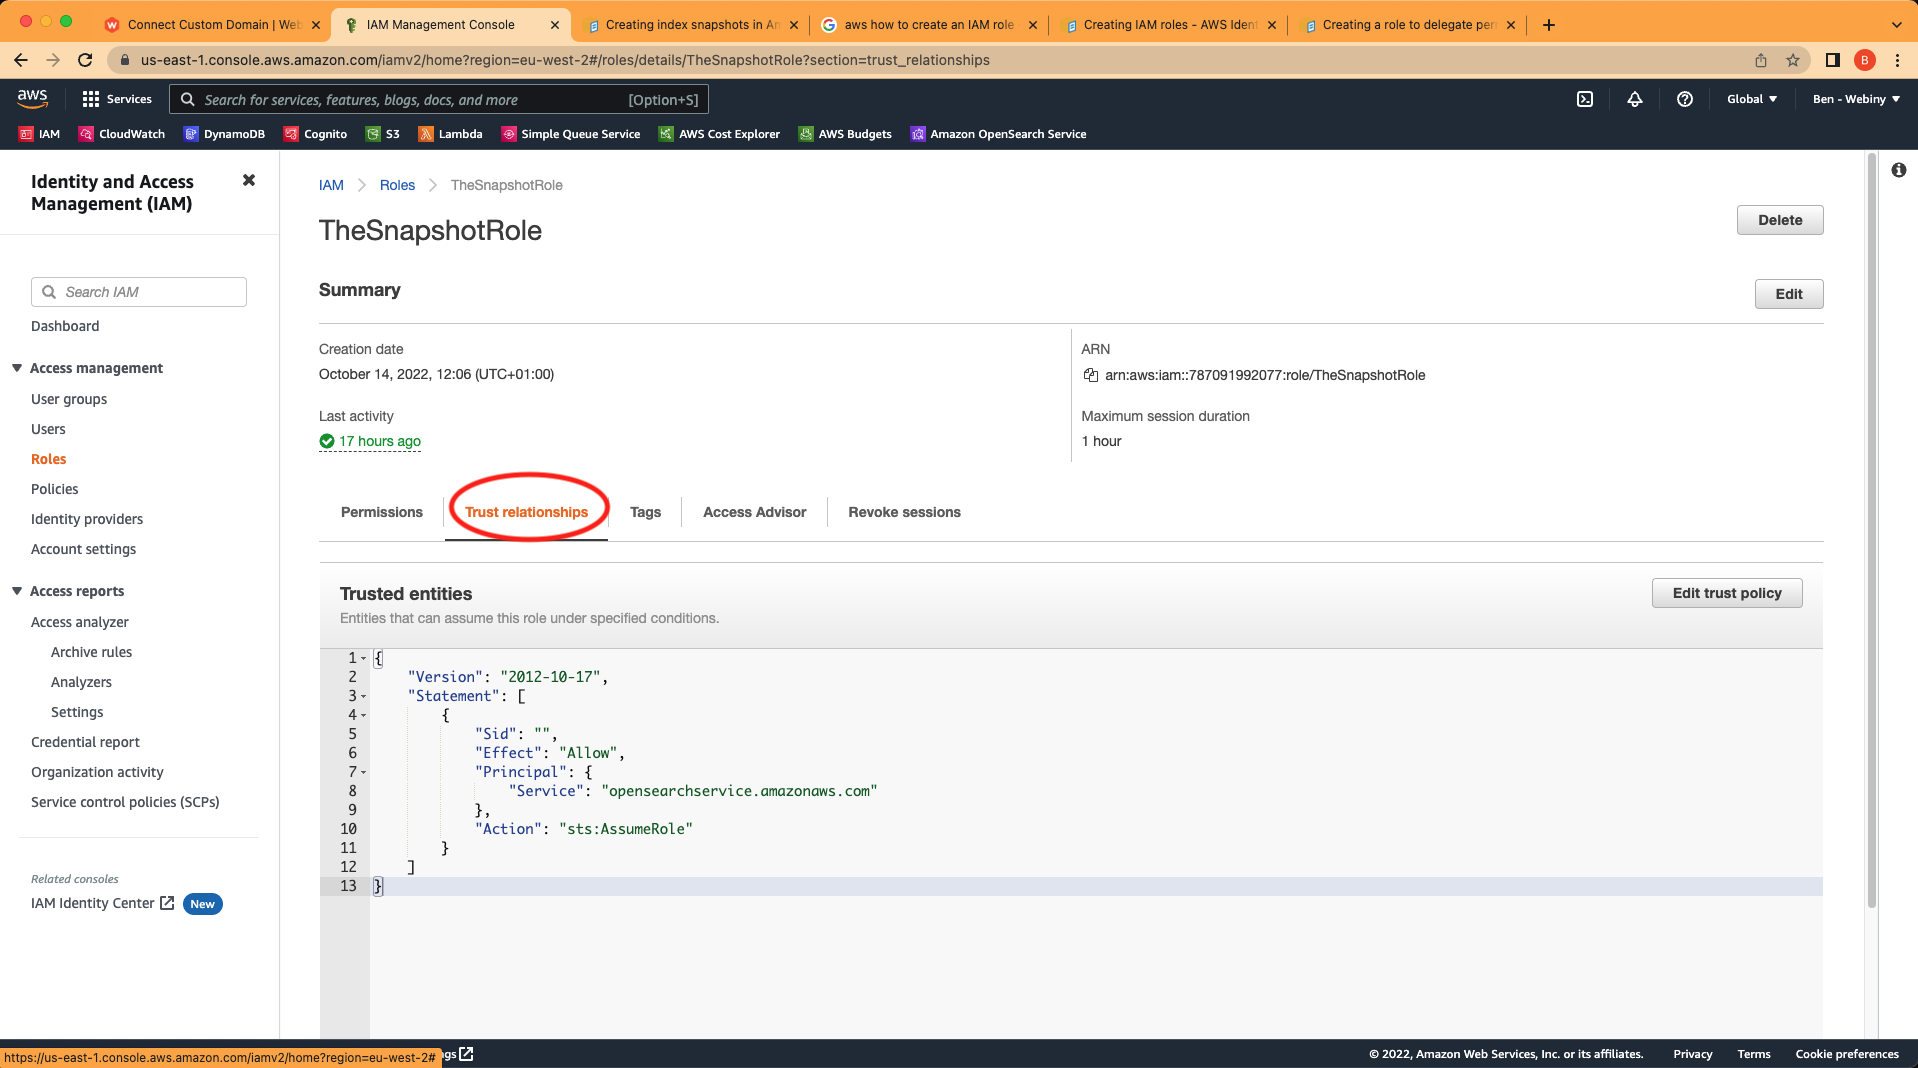
- Edit the trust relationship so that OpenSearch Service has the ability to assume the role (see the section in the table titled “Edit the trust relationship” on this page for the details of the trust policy)
- Pass the role you created to the OpenSearch Service by attaching a policy to the role (see the table heading “Permissions” on this page for the details of the policy you will need to add)
Please follow the links above for more details about how to achieve each step. Once you have completed these you should have a new role that looks like this:
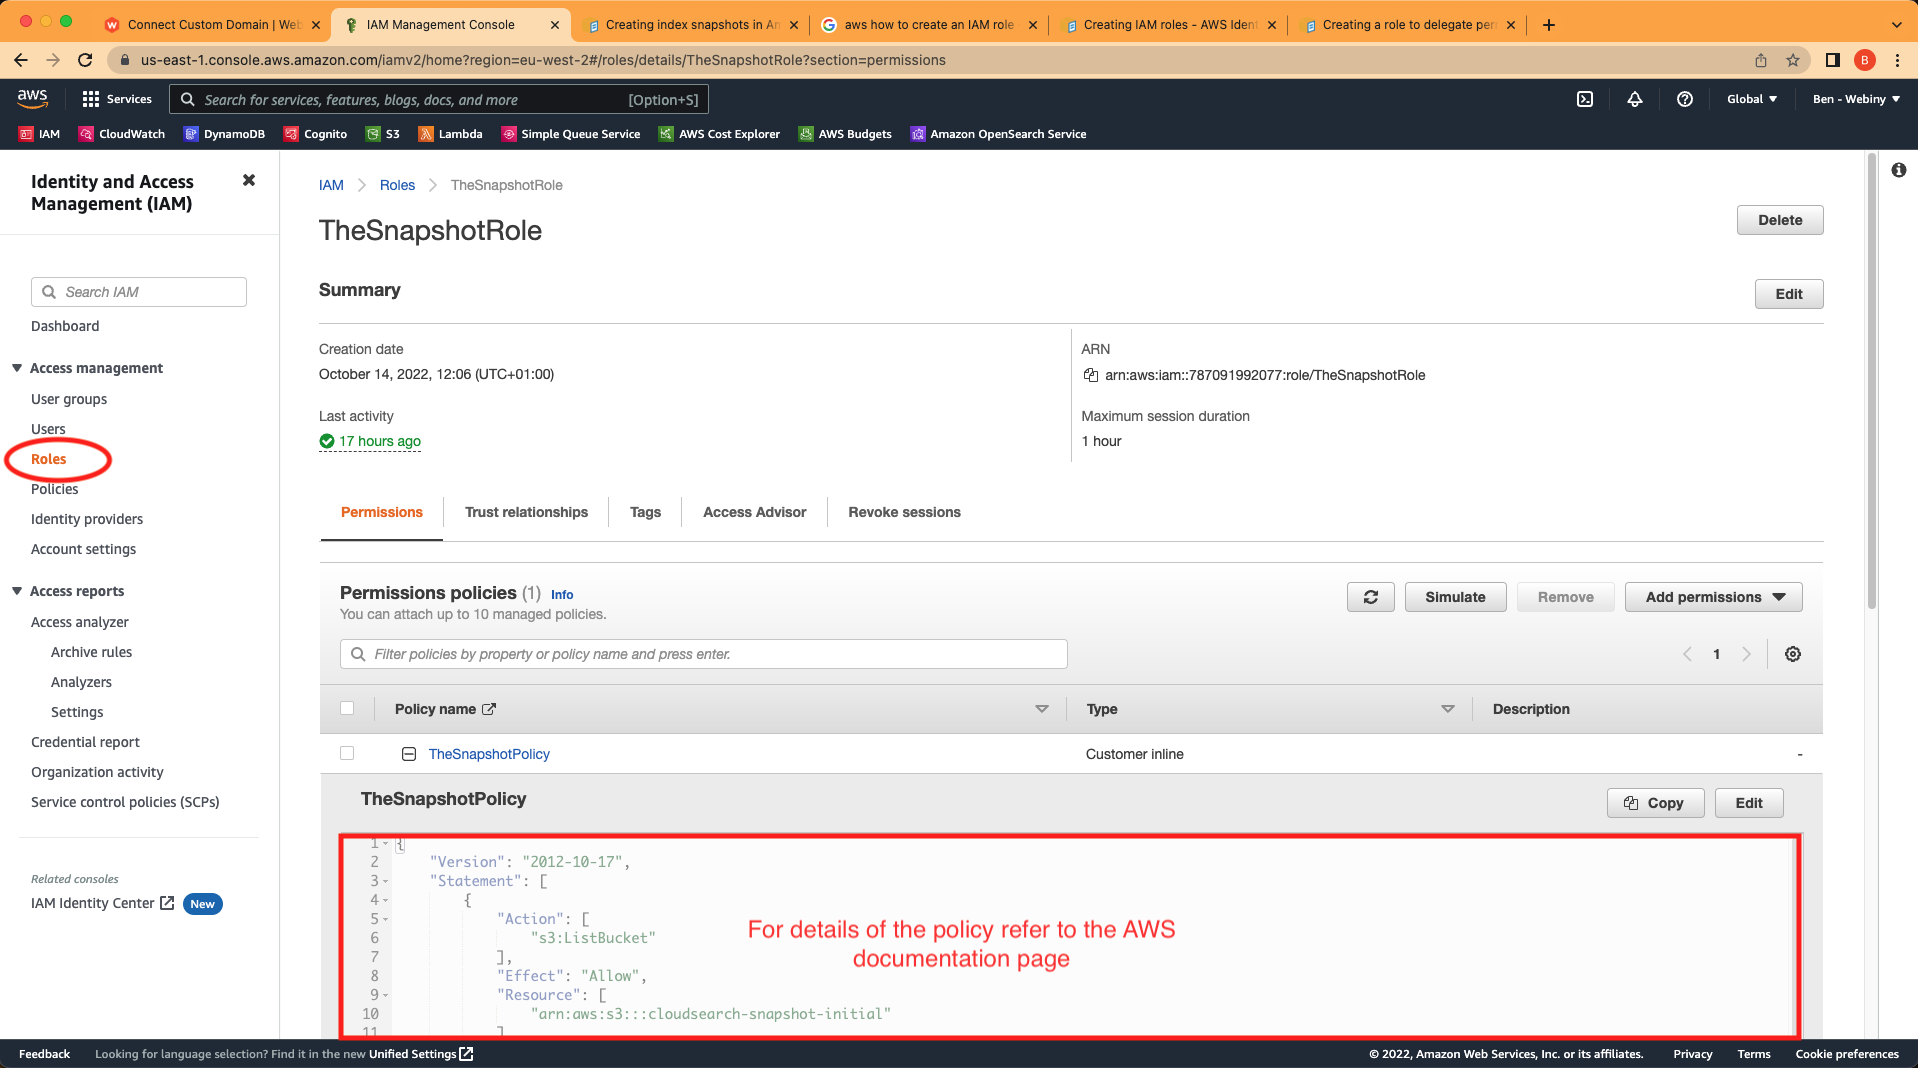 Snapshot role in the IAM dashboard
Under the Trust relationships tab it should have the following:
 Snapshot role permissions
Now we need to Register the S3 bucket as a repository for your snapshots. To perform this request we can’t use the AWS dashboard. Instead, you need to use Postman or another HTTP / API client so that we can send a signed request.
Create a new PUT request as shown in the screenshot following the format described in the step on the docs page linked above. You will need to add your AWS AccessKey and SecretKey to the Authorization tab and, if it isn’t present already, add the additional header Content-Type: application/json and the request body should contain the JSON as shown on the documentation page and in the screenshot.
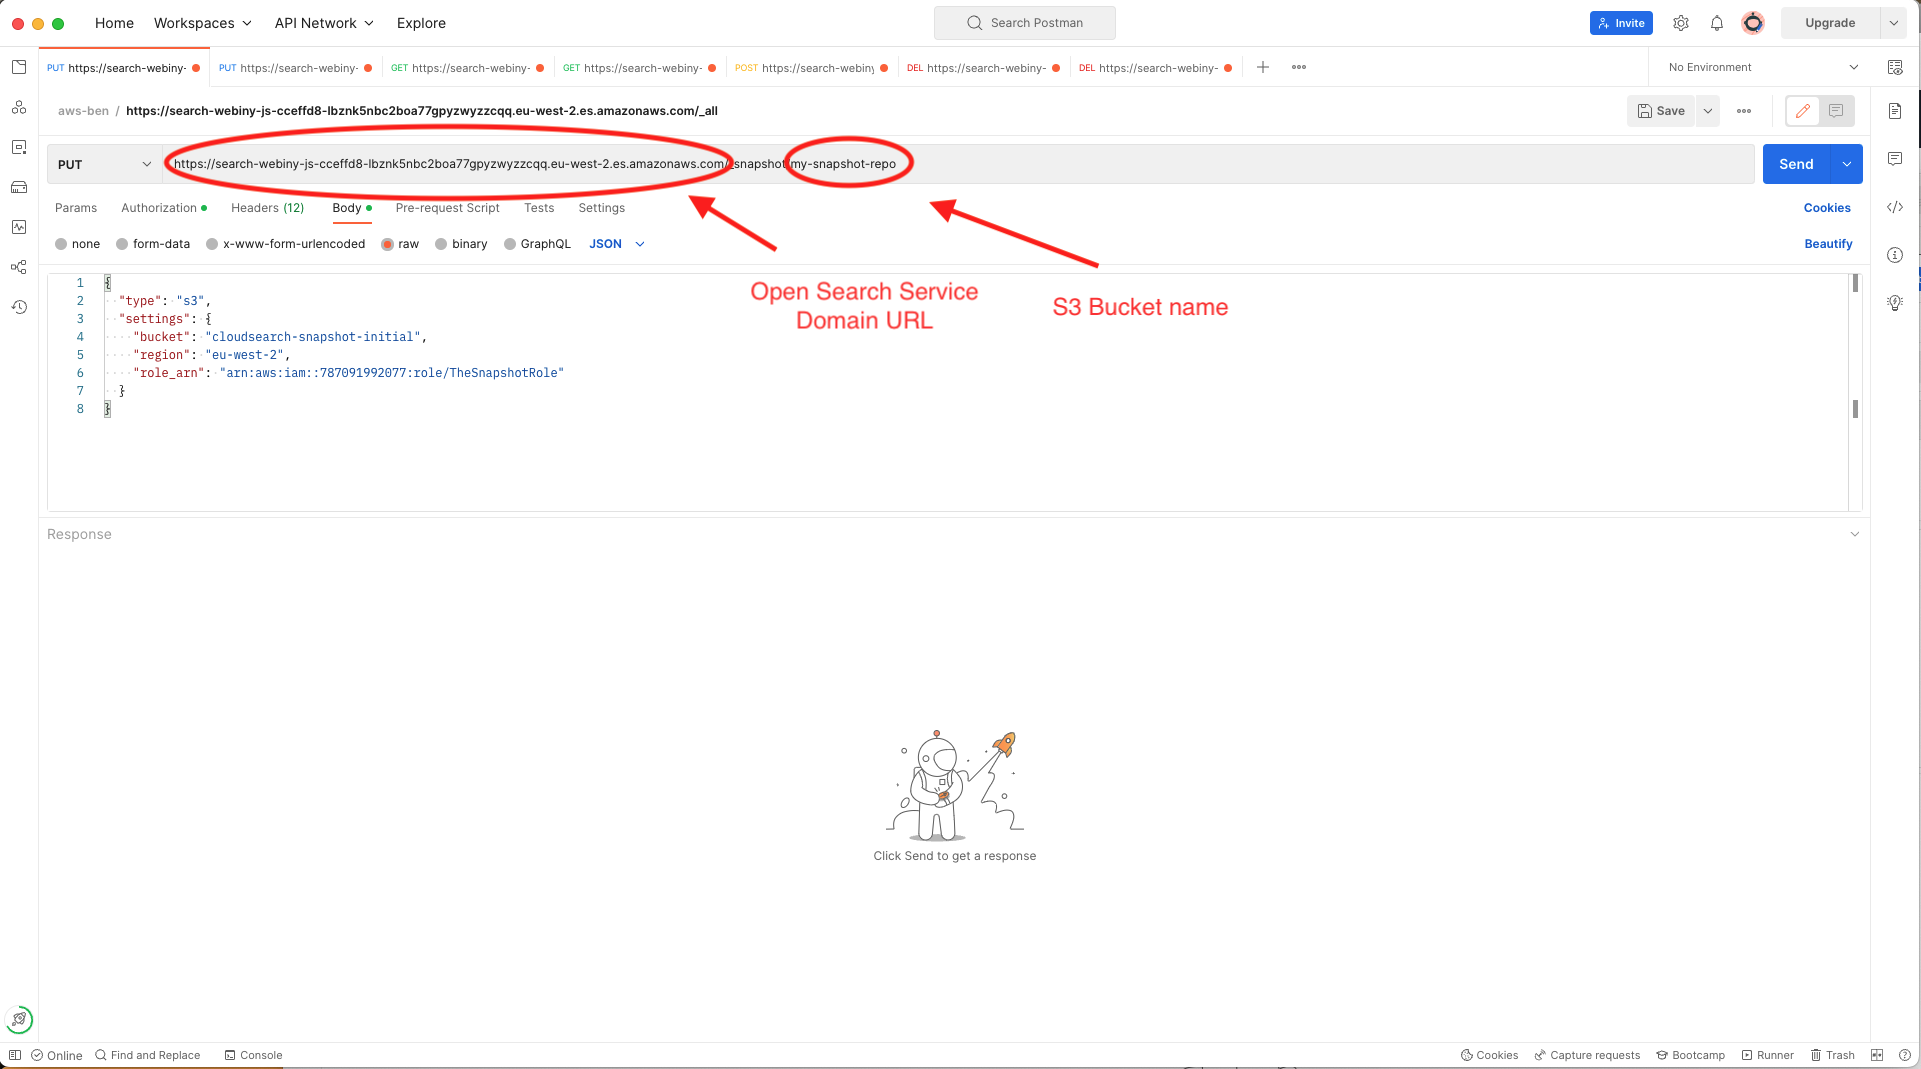 Put request using Postman to register the S3 bucket as a repository for OpenSearch Service snapshots
Now we can take a snapshot. Duplicate the request you made in the step above, and modify it to a PUT request with the format shown in the AWS docs page:
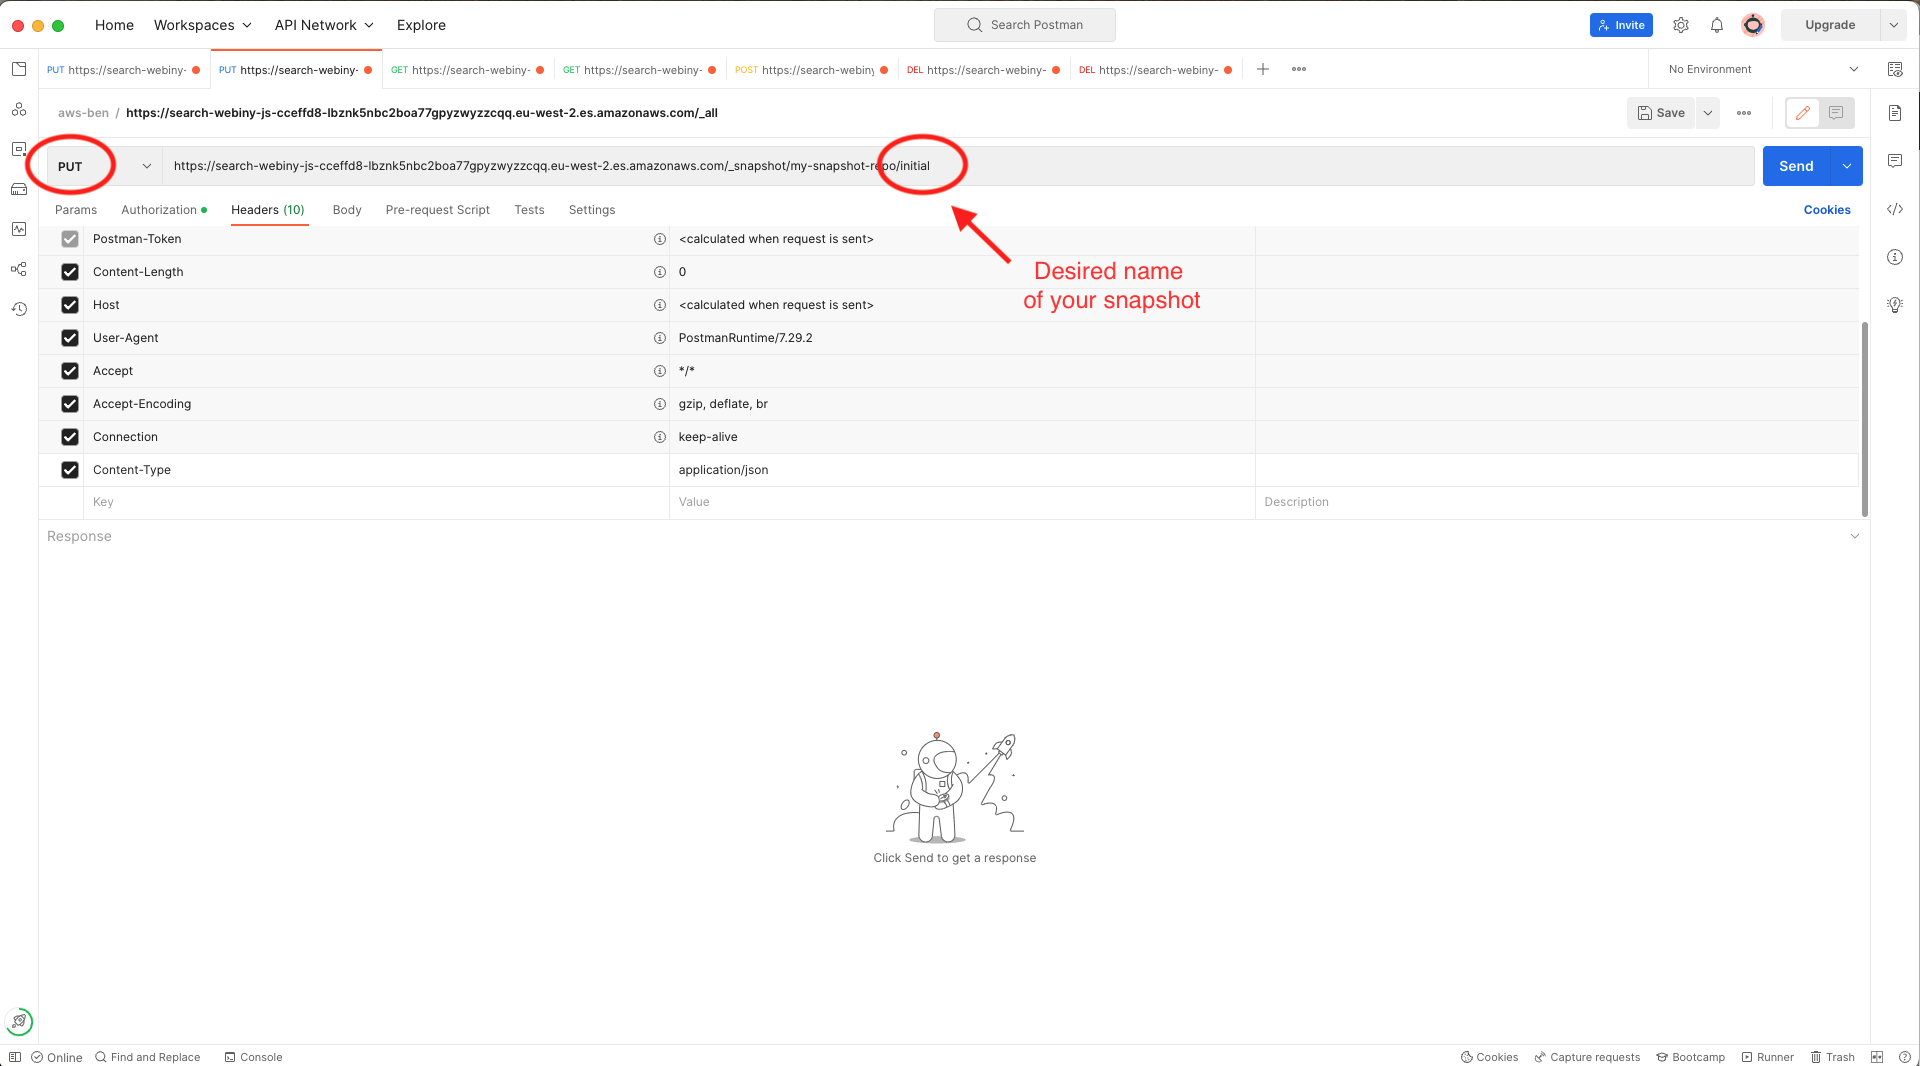 Put request using Postman to start creating a snapshot
Notice this time there is no content in the request body.
After a while you should be able to navigate to OpenSearch Service in your AWS account and see that your S3 bucket has been populated with the indices and other data:
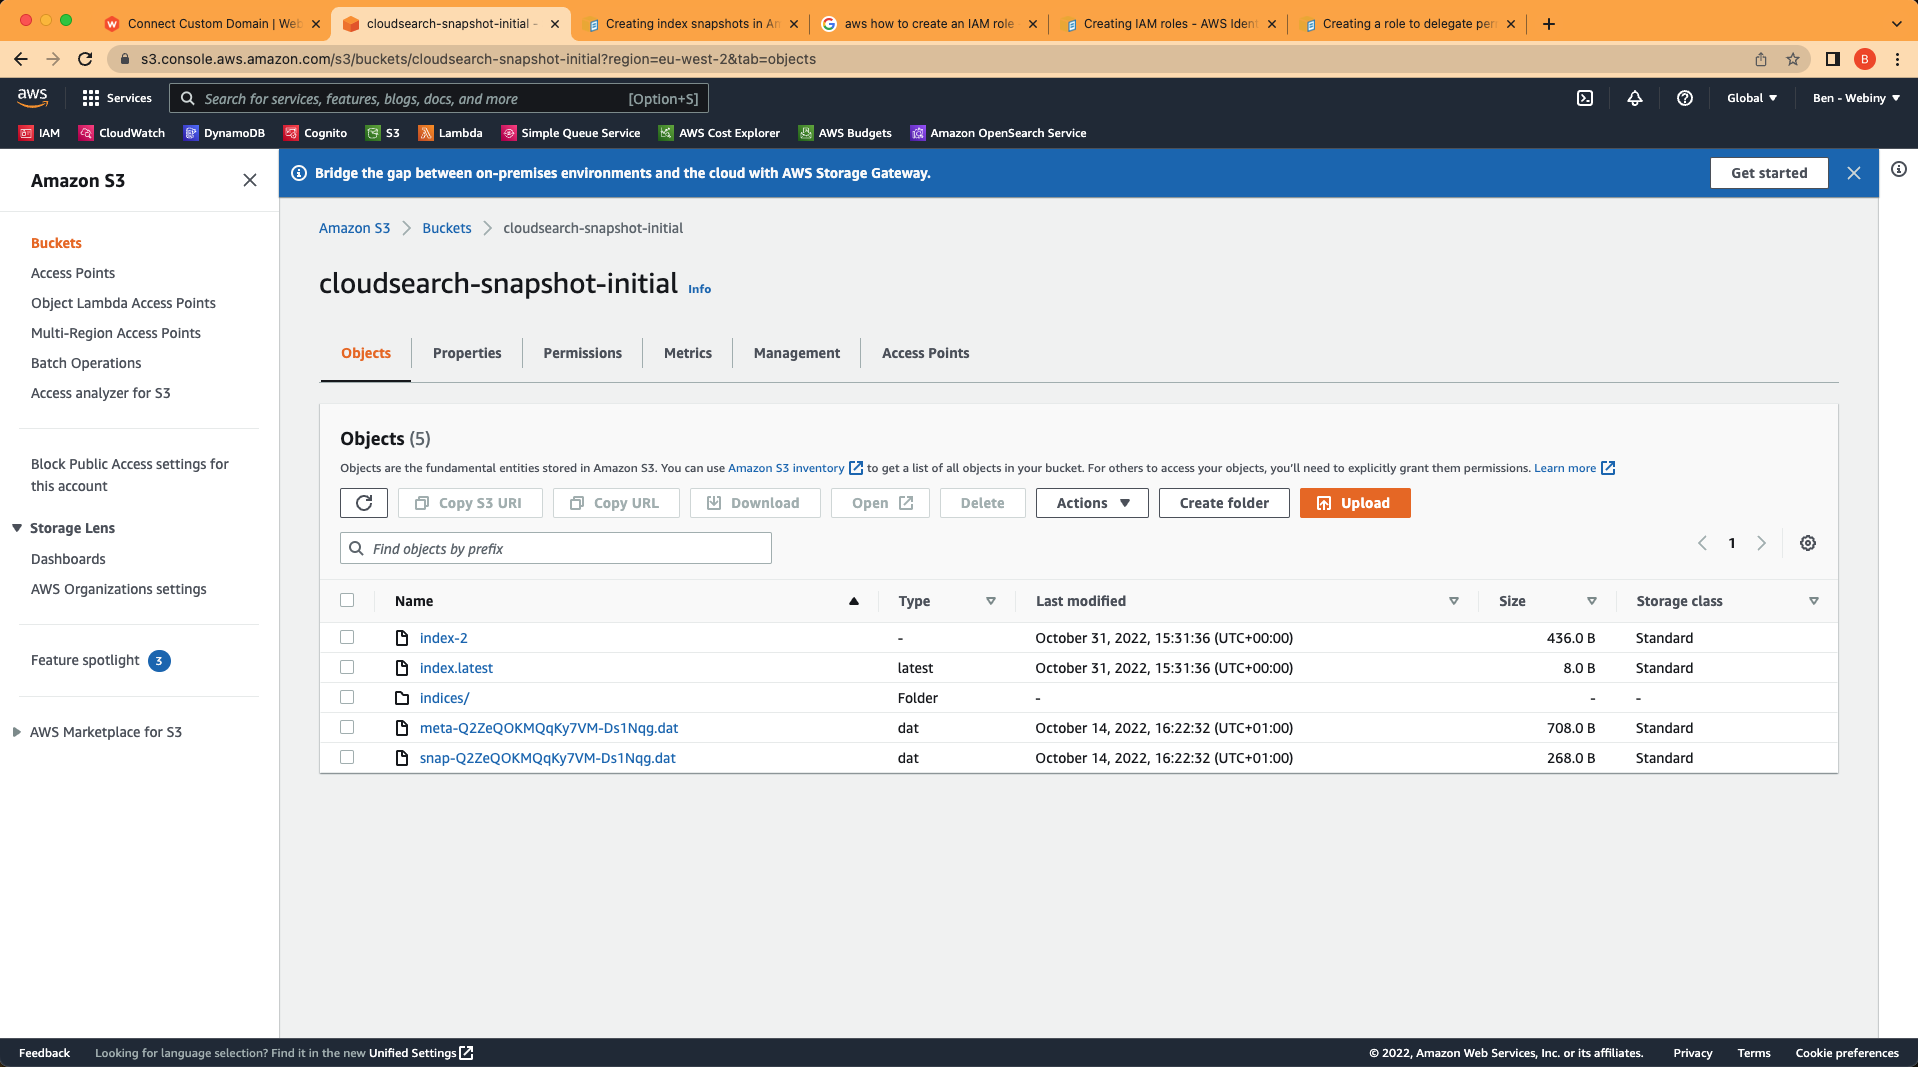 S3 bucket populated with indexes
Congratulations, you have successfully created a snapshot of your OpenSearch Service indexes.
Step 3: Restoring DynamoDB Tables From a Backup
Navigate to the DynamoDB section of you AWS dashboard and click on the “Backups” menu item. Choose a backup you want to restore, and choose “Restore” from the action buttons.
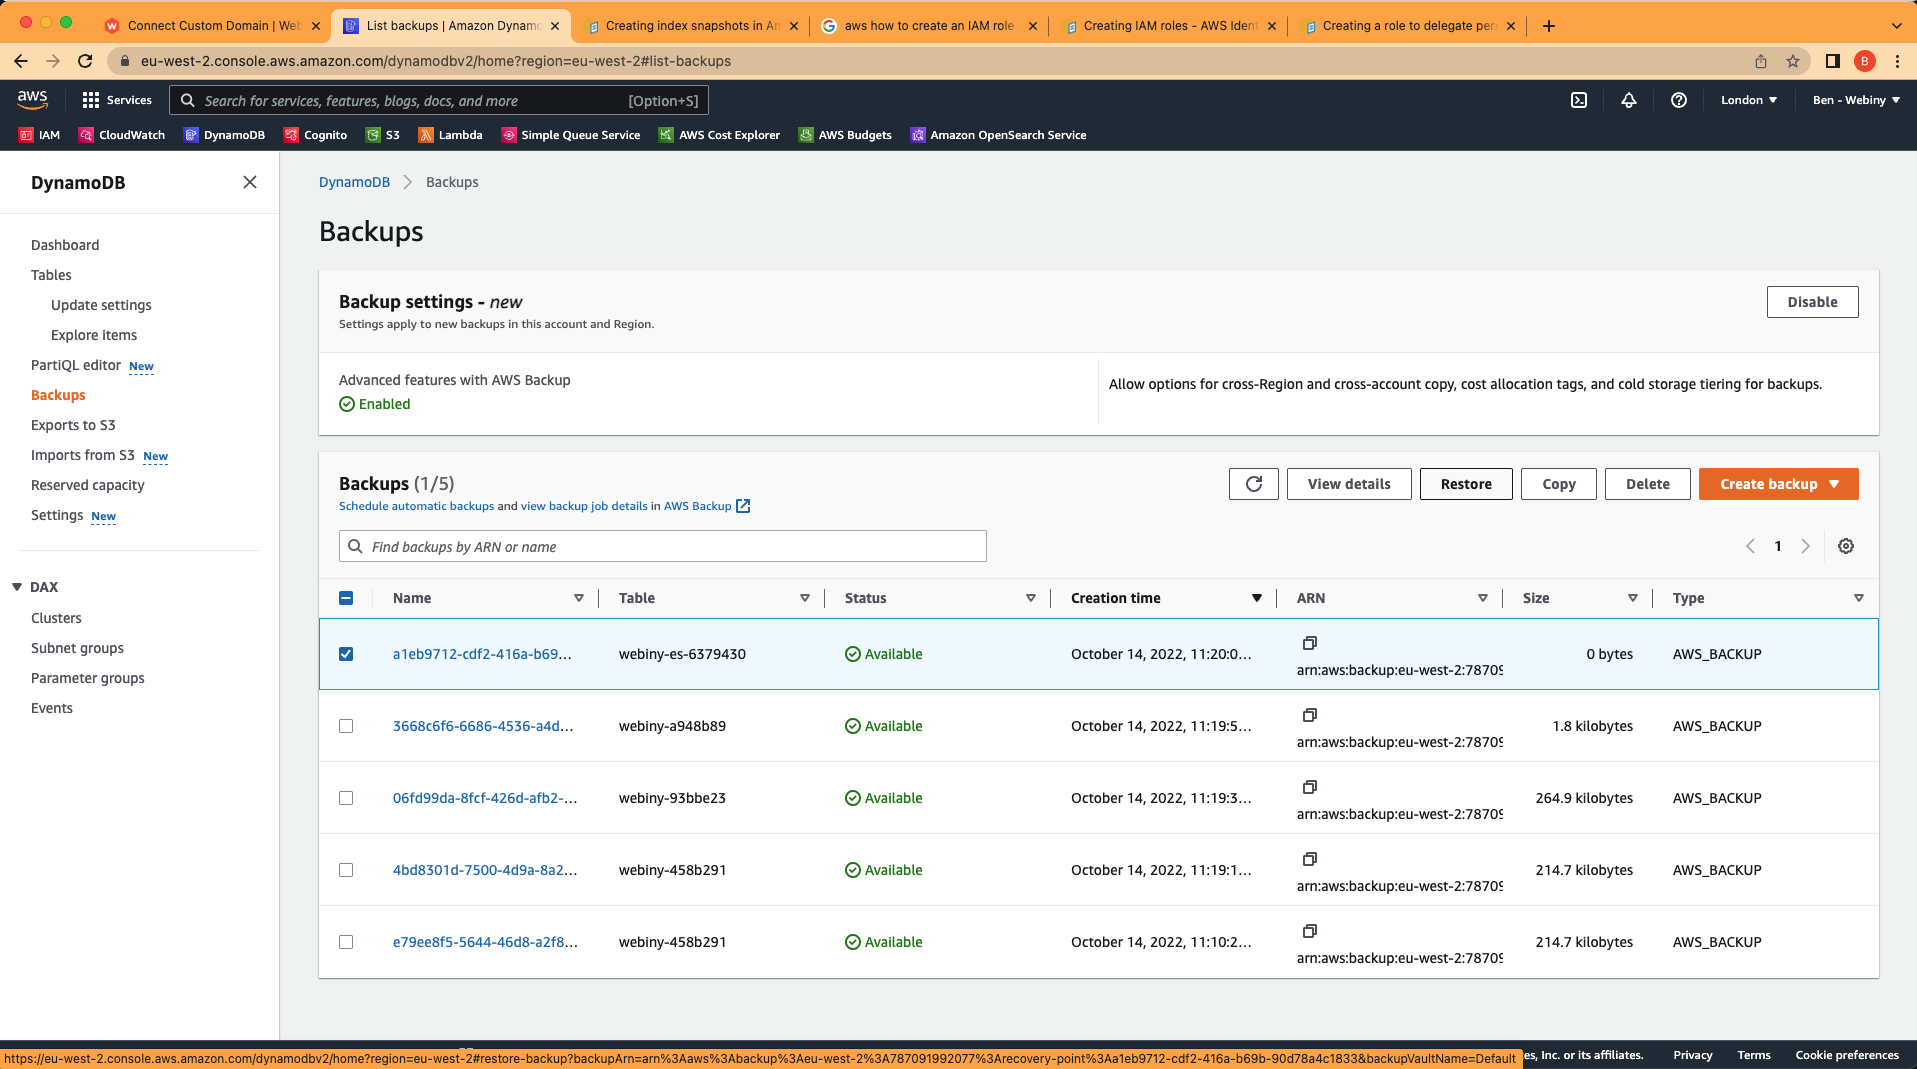 DynamoDB backups
You will see on the next page that the restore settings by default add a suffix of -restored to the database. Delete this suffix so that so that it will be the same name as the live table and therefore overwrite it.
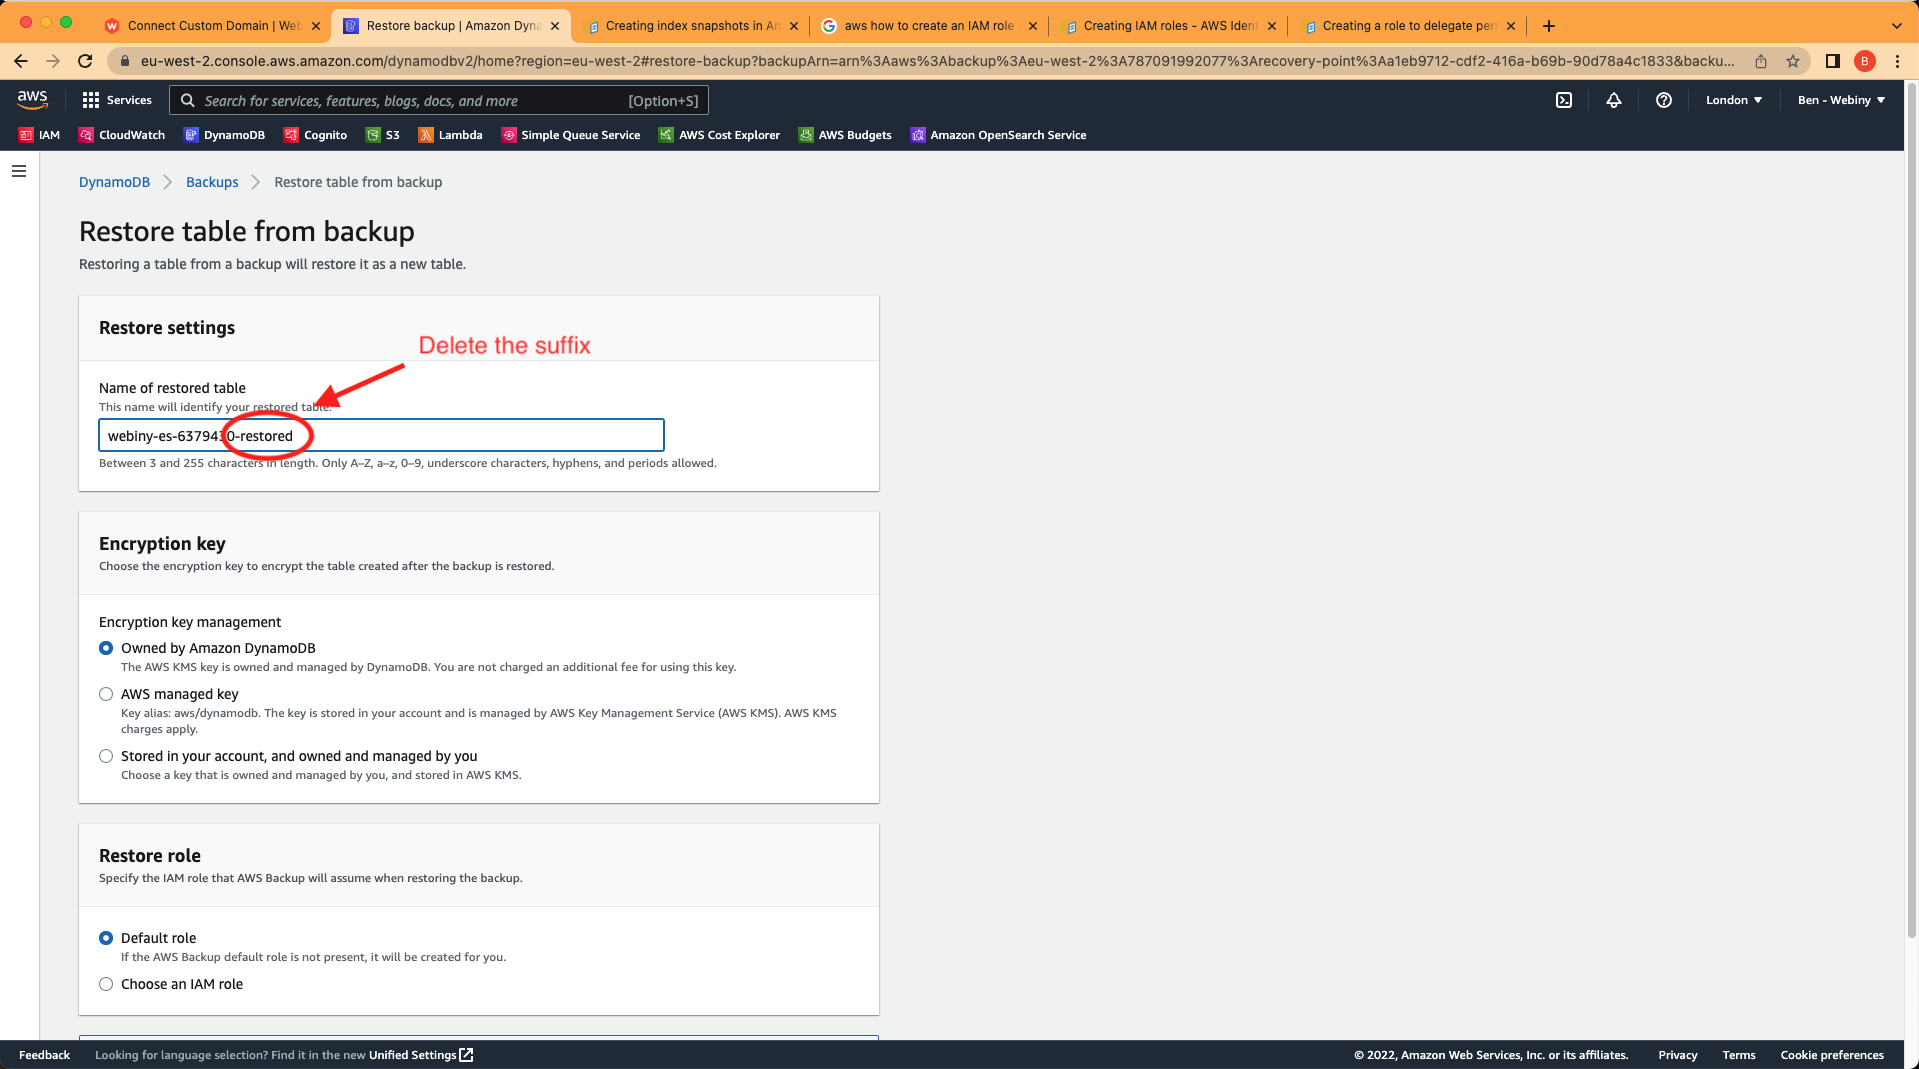 DynamoDB backups restore options
Click on “restore” and you will soon see the table has been restored from the backup.
Step 4: Restore OpenSearch Indices From a Snapshot
First, we need to delete existing indexes otherwise there will be errors when trying to restore from the snapshot. To do this you can make a DELETE request to your indexes:
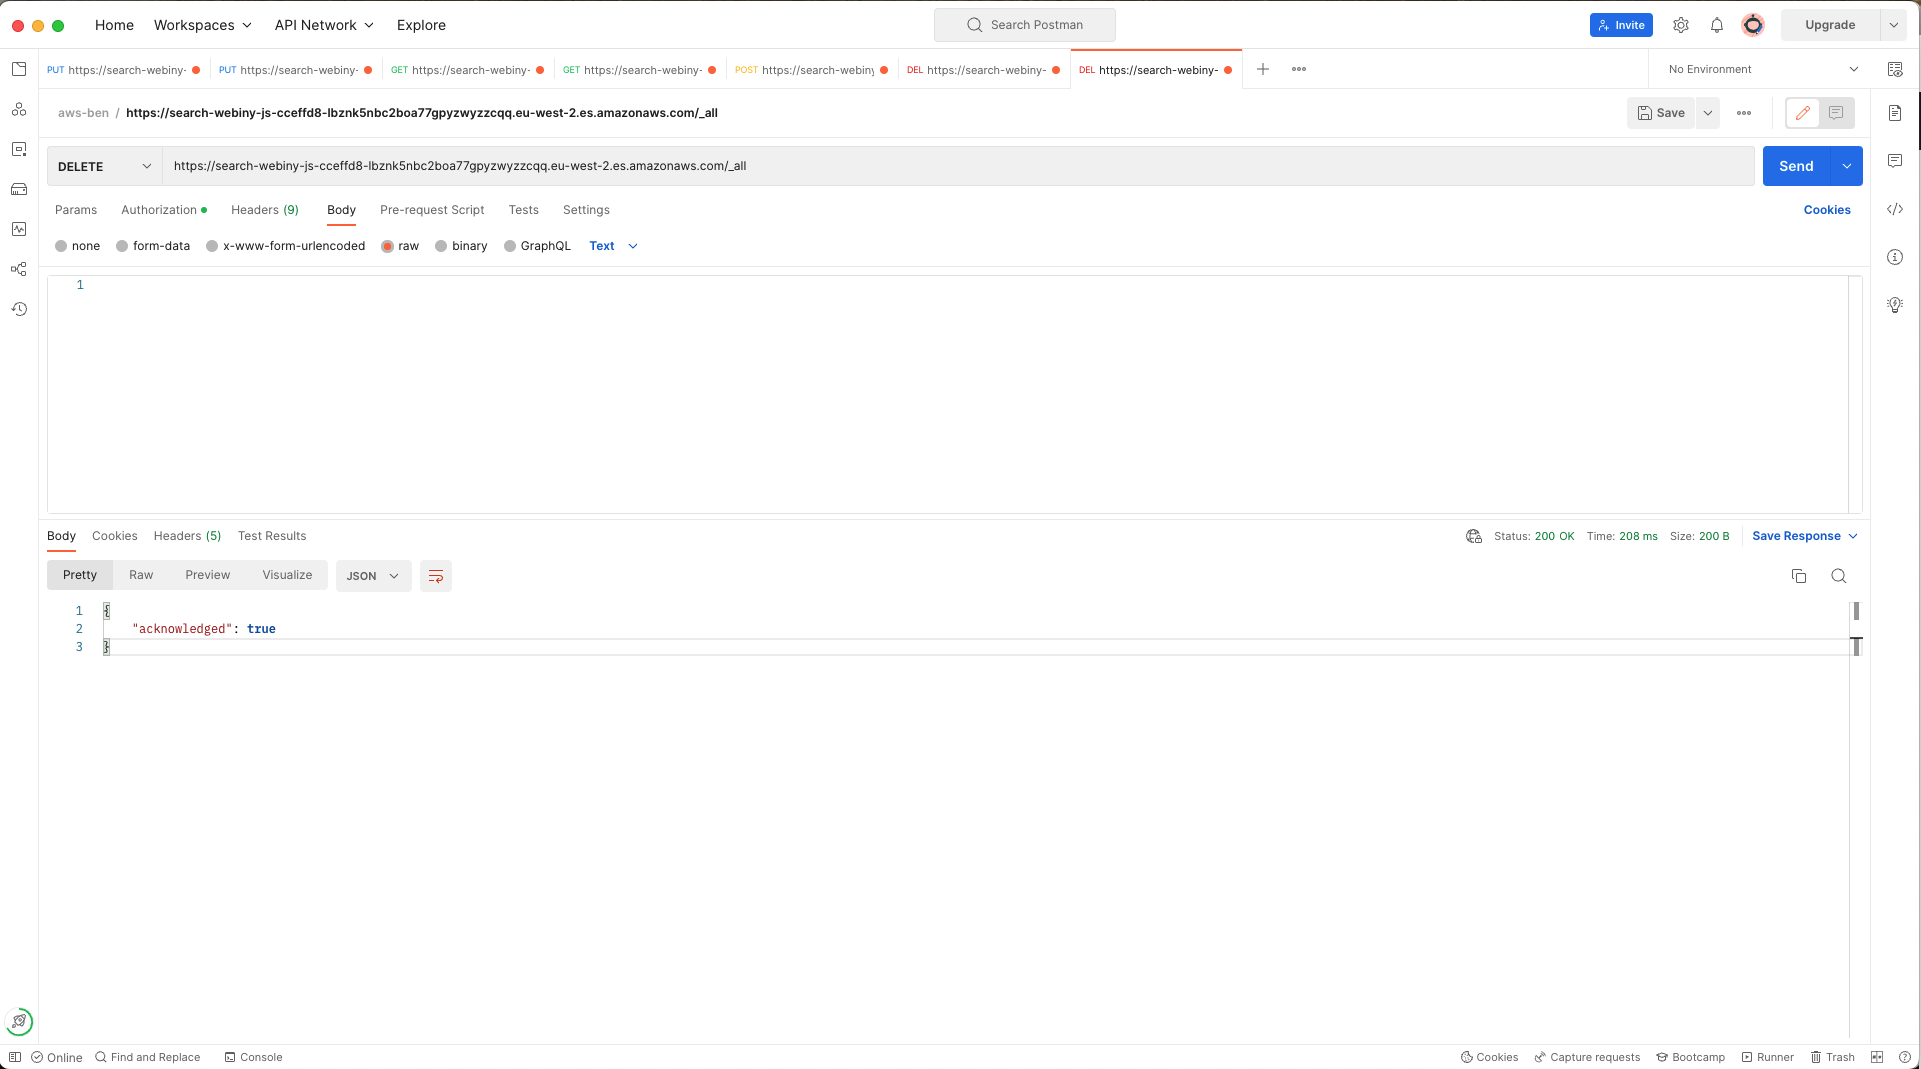 ElasticSearch delete existing indexes
If you don’t remember what your snapshot is called, or you want to verify it has completed, make a GET request to the _all endpoint of your snapshot repository (eg. the S3 bucket you stored your snapshot in):
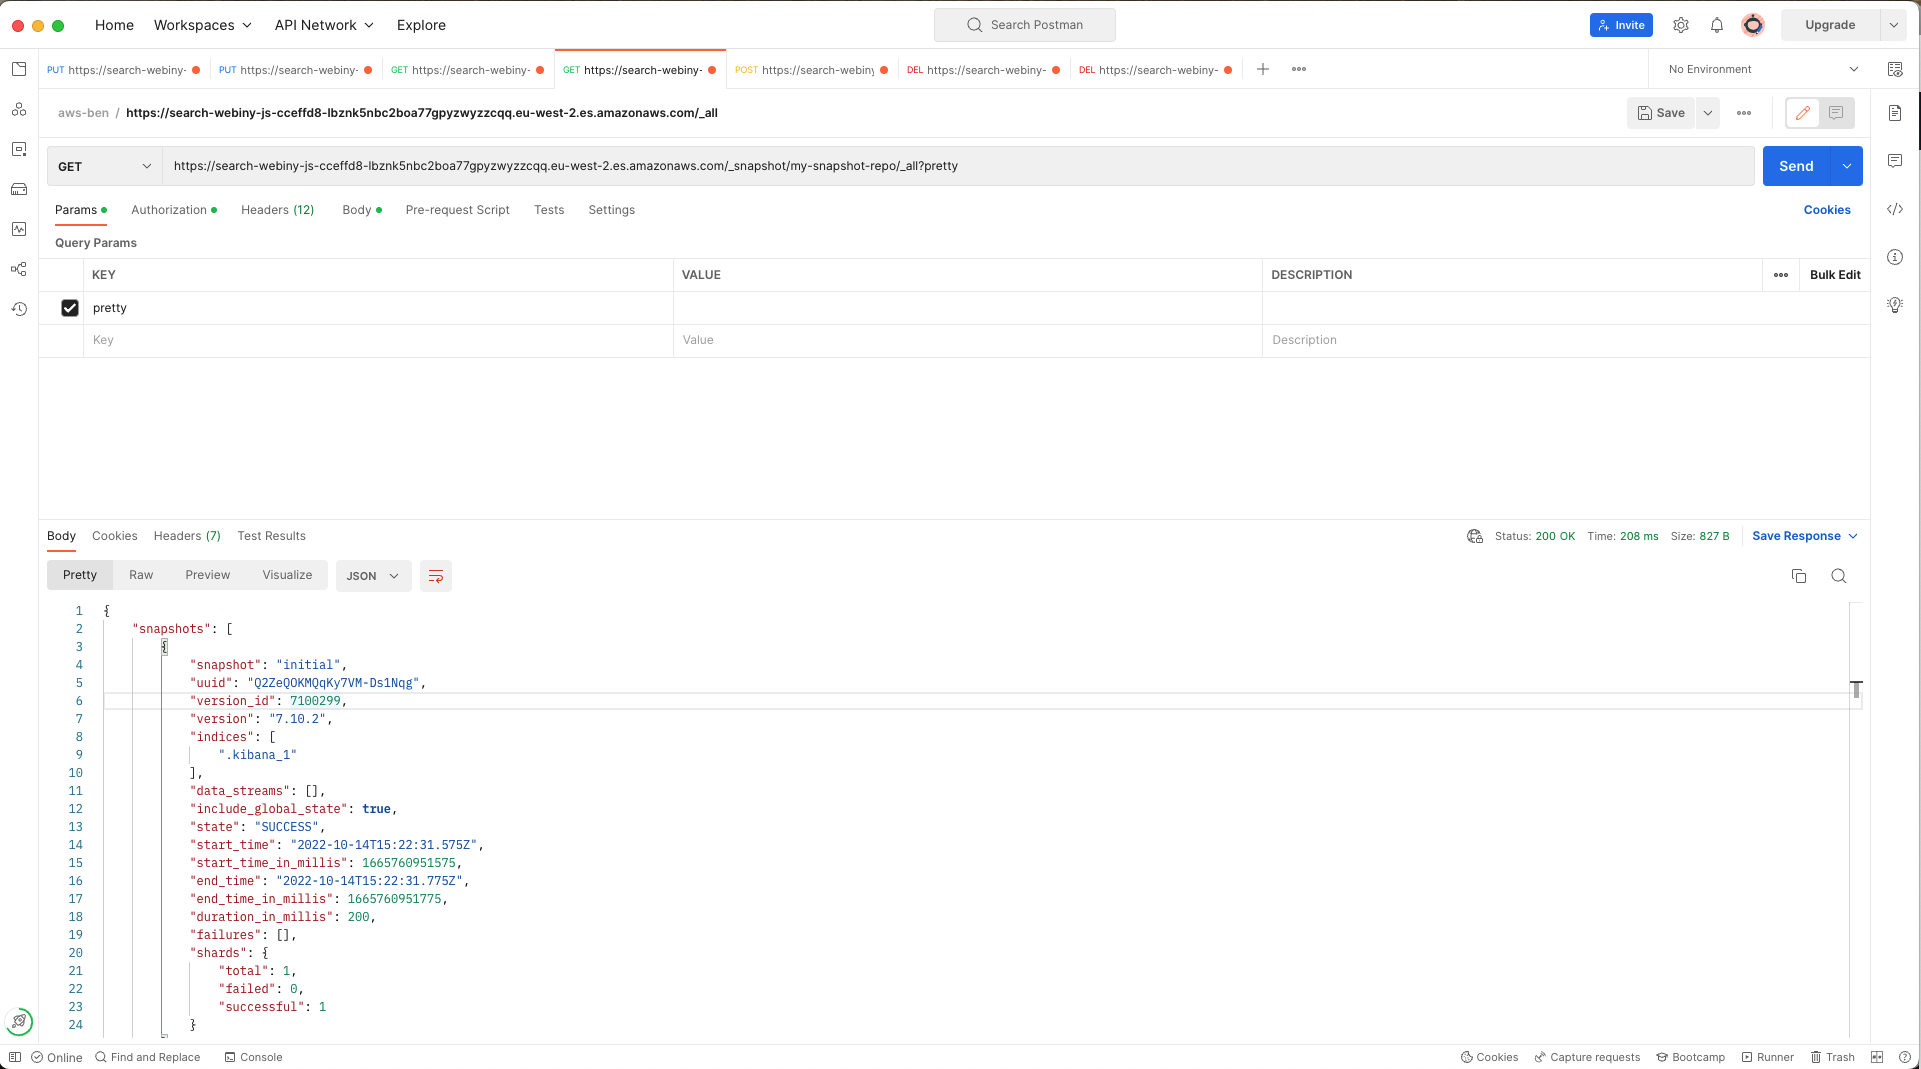 ElasticSearch get snapshots
If it’s there, we can restore our ElasticSearch indexes by making a POST request to the _restore endpoint by appending with the name of that snapshot to the request:
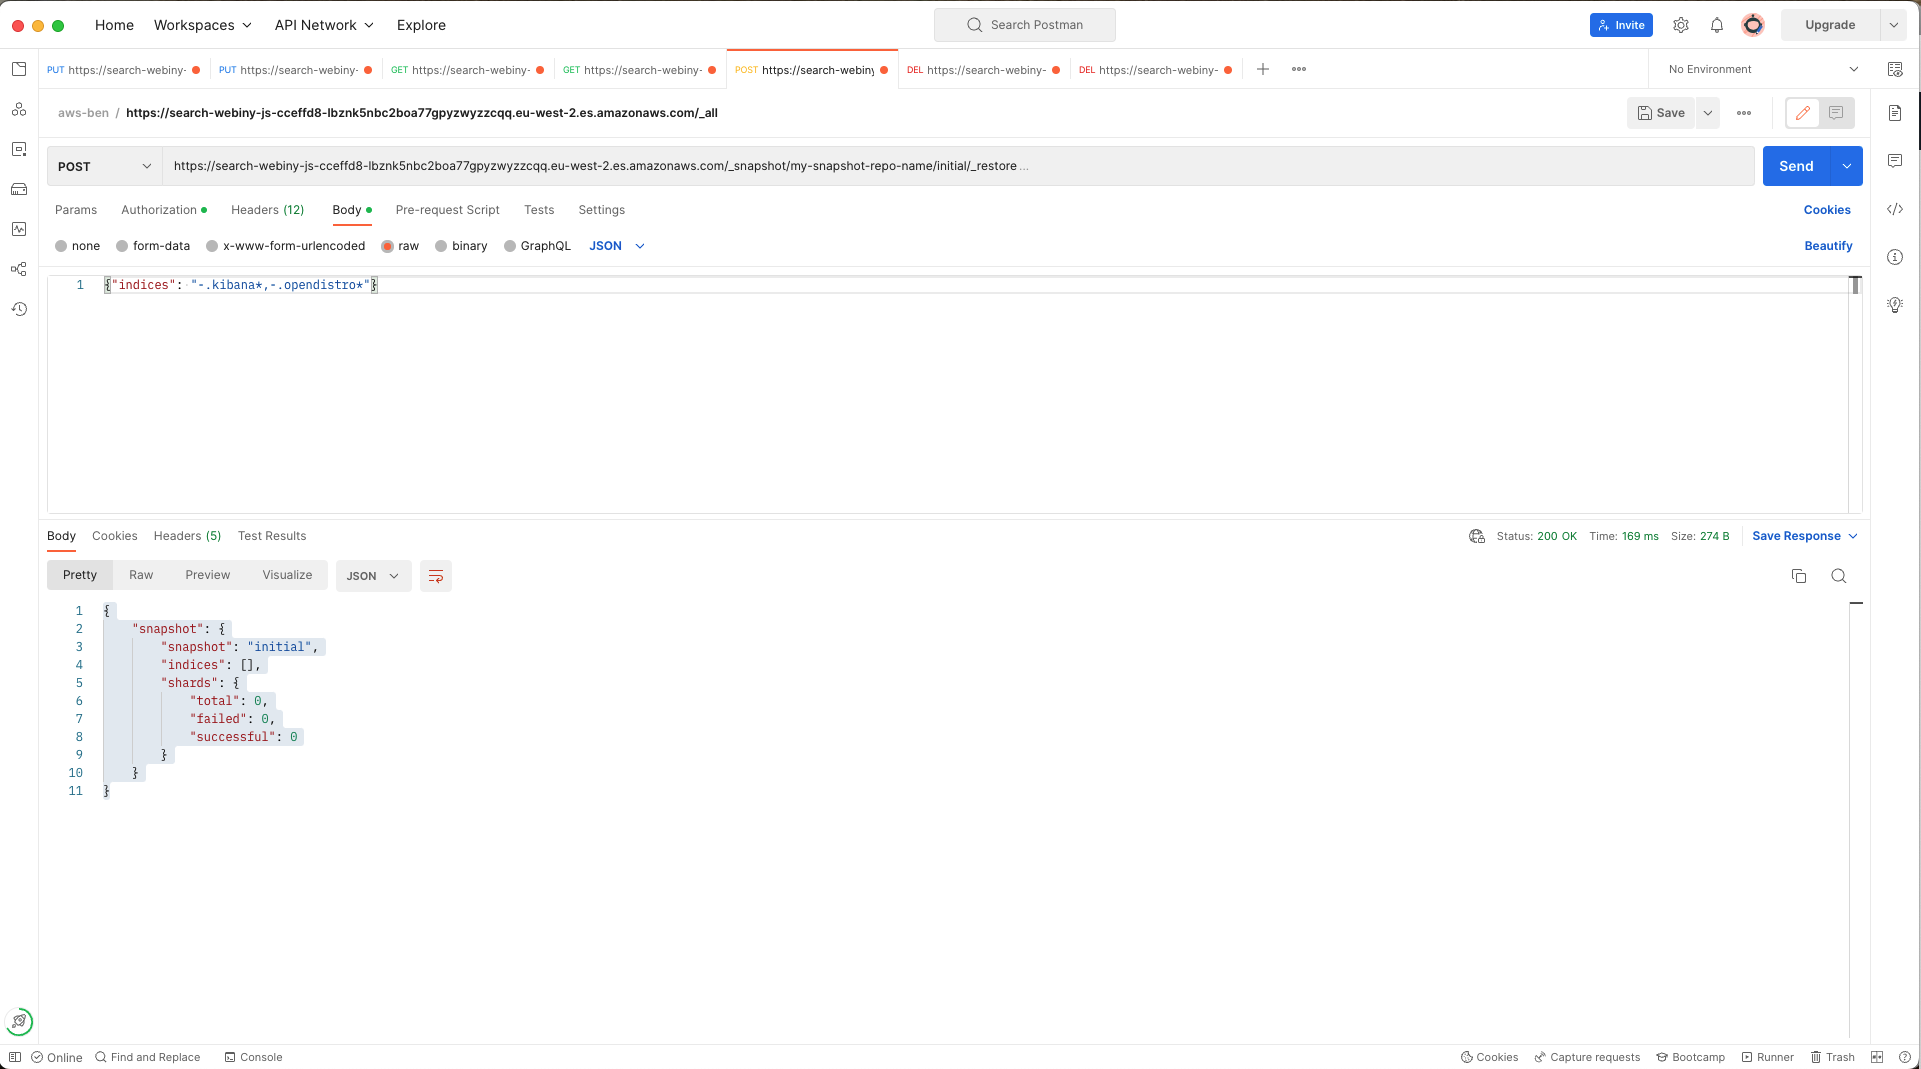 ElasticSearch restore snapshot
Notice that in the request body I have specified that I don’t wish dashboards and access-control indexes to be restored.
These steps are covered in more detail on the AWS documentation page.
Once the snapshot has been restored, you should be able to refresh your Webiny admin panel and see the application is in the state it was when you took the initial snapshots and backups.