File Manager > Integrations
Programmatic File Upload
Learn how to upload files into the File Manager programmatically.
This feature is available since Webiny v5.36.0.
- how to programmatically upload files into the File Manager
Overview
Upload of files into the File Manager is a 3-step process, which is described, from the architectural point of view, in the File Upload article. Very often, files can be several gigabytes (or even terabytes) large, which makes it impossible to use the GraphQL API, or even a REST API, to upload binary content using the Lambda functions, which power our API, due to its physical limitations.
To make it possible to handle files of all sizes, up to 5TB in size, we have to upload those binary payloads directly to the AWS S3 service. The three steps to upload a file into the File Manager are as follows:
Create a pre-signed POST payload for the file you’re uploading.
Send the file directly to AWS S3, using the pre-signed POST payload.
Create a file record in the system, so the File Manager is aware of the file in the AWS S3 bucket.
Creating an API Key
Since the GraphQL API sits behind a security layer, that forbids unauthorized access, we need to create an API key, which we’ll then use in our file upload process.
An API key is a random non-human-readable string, which essentially contains a list of allowed operations that its user (a real user or an application) can perform. Once created, we include it as the Authorization header on every HTTP request we issue (with our GraphQL client of choice), for example:
Make sure to include the required Bearer keyword, placed before our actual API token.
Failing to correctly include the API key via the Authorization HTTP request header will prevent you from performing any sensitive GraphQL query or mutation.
Check your GraphQL client’s documentation in order to ensure that the API token is correctly included in every HTTP request.
API Tokens are created via the Security Webiny application, by opening the API Keys section:
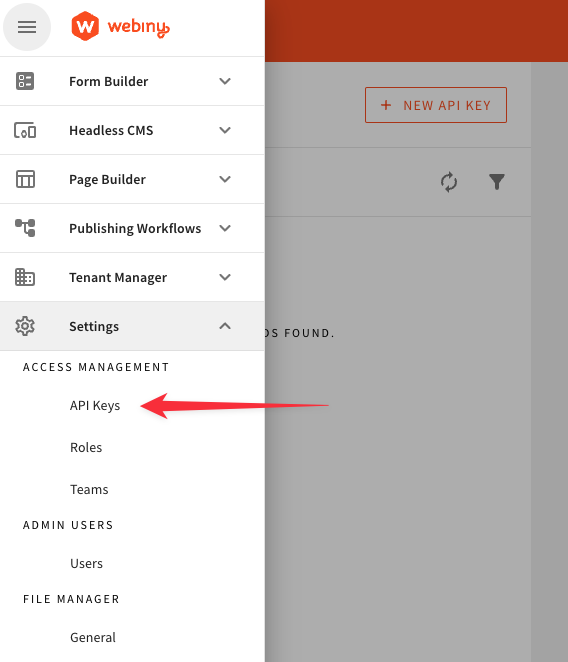 Security - API Keys
Once selected, we’re redirected to the API Keys section, where we can create a new, or update an existing API key. But most importantly, we get fine-grained control over which operations our API keys can, or cannot, perform. For example, the following selection allows API key users to perform all File Manager actions exposed by the GraphQL API:
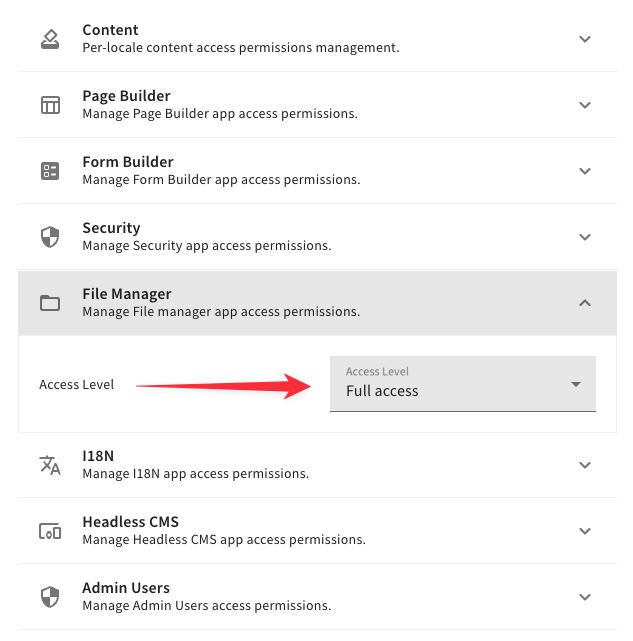 Fine-grained Access Controls
Once the API key has been created, the key token is automatically generated, and you should see it in the user interface:
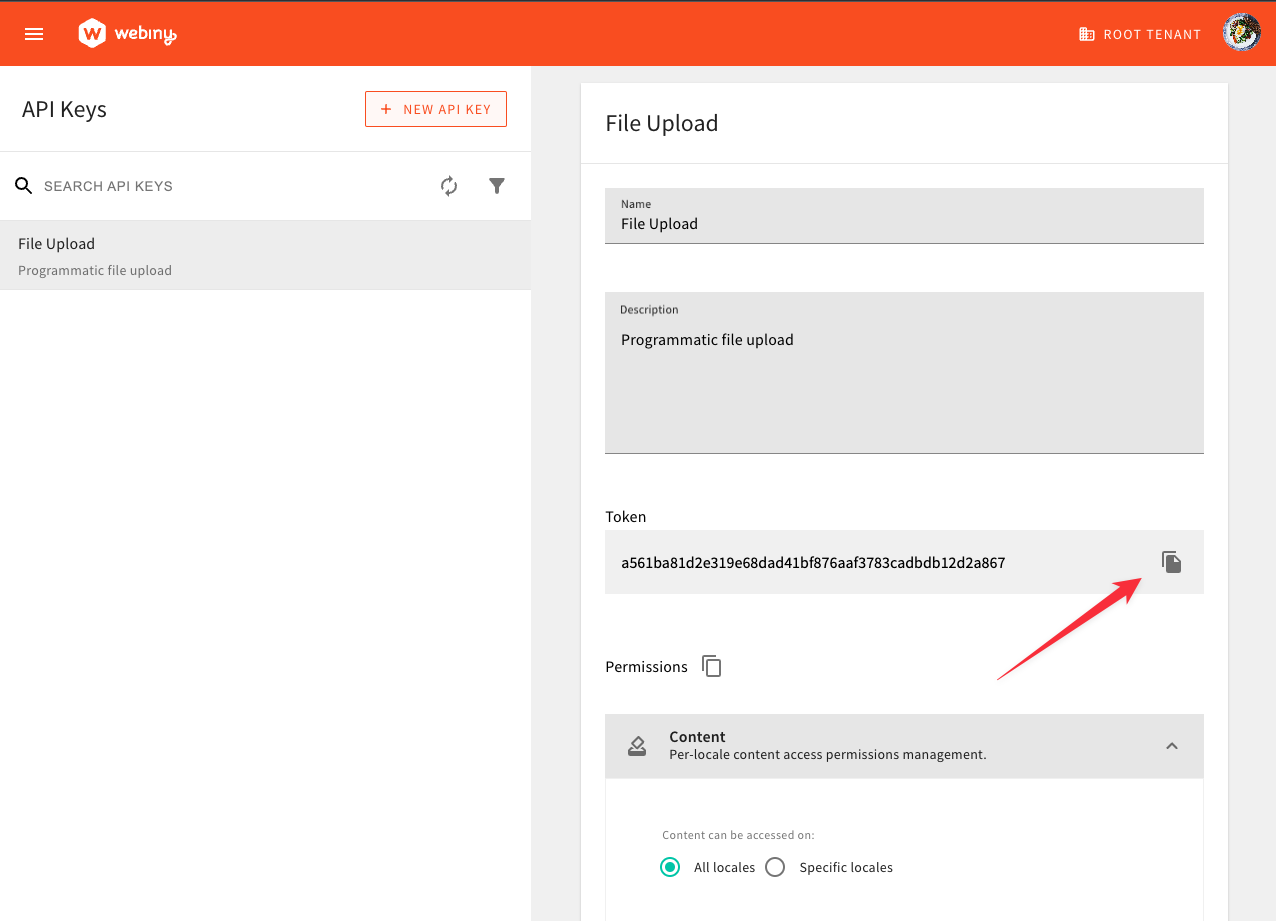 Copy the API Token
From there, you can easily grab it by clicking on the Copy button, located on the right side of the API token, and paste it in an appropriate place, somewhere where your GraphQL client can access it.
Upload File to the File Manager
To make it really easy for developers to dive right into the upload process, we’ve created this script, which covers all 3 steps, which you can copy/paste, update the required variables, and run.
The script uses two external packages, which you will need to install from npm:
- node-fetch
 to send HTTP requests
 - form-data to create a file upload form
Once you run this script in your CLI, using a simple node fileUpload.js command, the file from the script will be uploaded to the File Manager, and will be accessible via the public URL. You will also find the uploaded file in your File Manager UI.