File Manager > Extending Functionality
Create a Custom File Manager Renderer
Learn how to create a custom renderer for the File Manager component
Overview
File Manager component can be customized using our Composition API, which allows you to replace the default renderer entirely, or apply conditional logic based on the props being passed to it. In this article, we’ll show how you can implement a custom renderer.
Replacement of the default renderer is useful if you want to integrate your own asset manager, which communicates with a different API, or a third party library/service (like Cloudinary, Dropbox, etc.), and have Webiny use your new component everywhere in the system.
This article demonstrates renderer customization to completely bypass the default File Manager GraphQL API. If you want to extend the existing renderer, or the File Manager GraphQL schema, please get in touch on our Slack Community .
.
FileManagerRendererProps
To understand the FileManager React API, let’s look at the following props type. These are the props that are passed to the renderer, and these are the props that you should be able to handle in your custom implementation, as they’re used in various places in Webiny.
Replacing the Default Renderer
The following source code demonstrates everything you need to create and register a component plugin for the File Manager renderer.
The article assumes that you’re using the default Webiny setup, thus the usage of Cognito in the code example.
And that’s it! With this, we’ve created the most basic custom File Manager renderer which will now be rendered everywhere in the system. Here’s a little preview of what it looks like in the Webiny Admin app.
And if we inspect the form state, we’ll find our image data exactly as we specified in our custom renderer:
 Image from the custom renderer
Notice how we don’t have our meta array present in the state. That’s because the view in the video uses a <SingleImageUpload/> component which, by default, ignores the meta returned from the File Manager.
If this was a simple FileManager component, form state would look like this:
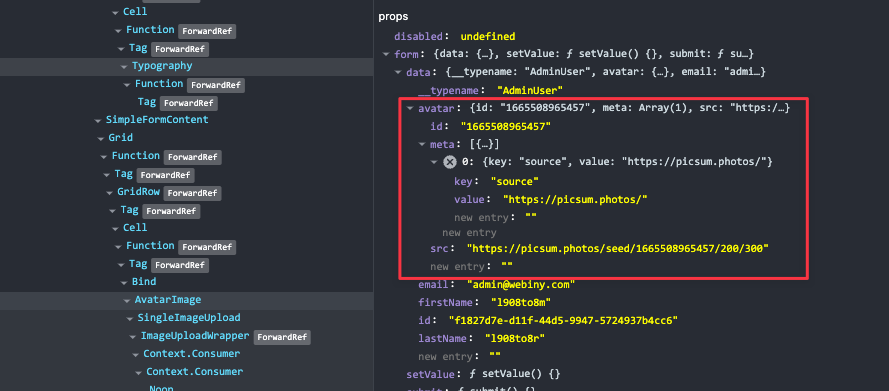 Image from the custom renderer with meta
Conclusion
We’ve covered how to override the default File Manager renderer and implement your custom logic of handling files. From here, you can continue upgrading this basic example and connect your React component to an external API or an asset management service. The only thing you need to follow is the component interface defined by the FileManagerRendererProps type.